

How to Add/Remove WooCommerce Product Attributes?
Adding or removing product attributes like colors, sizes, or styles in WooCommerce can be time-consuming and repetitive when dealing with thousands of products.
Adding or removing product attributes like colors, sizes, or styles in WooCommerce can be time-consuming and repetitive when dealing with thousands of products.
With Smart Manager, you can add/remove existing product attributes or create custom attributes using Inline or Bulk Edit, and even export them to CSV, all in just a few clicks.
Steps to Add/Remove WooCommerce Product Attributes in Smart Manager
- Go to the Smart Manager dashboard. Using the top navigation bar, search for and select
Productsdashboard from the dropdown menu. - To view product attributes in the grid, click on ‘Columns’ and enable the Attributes field. If the field isn’t visible, first edit it for at least one product using WooCommerce > Products. Then, check the Smart Manager Columns section, if the field appears in the ‘Disabled’ list, simply drag and drop it to enable.
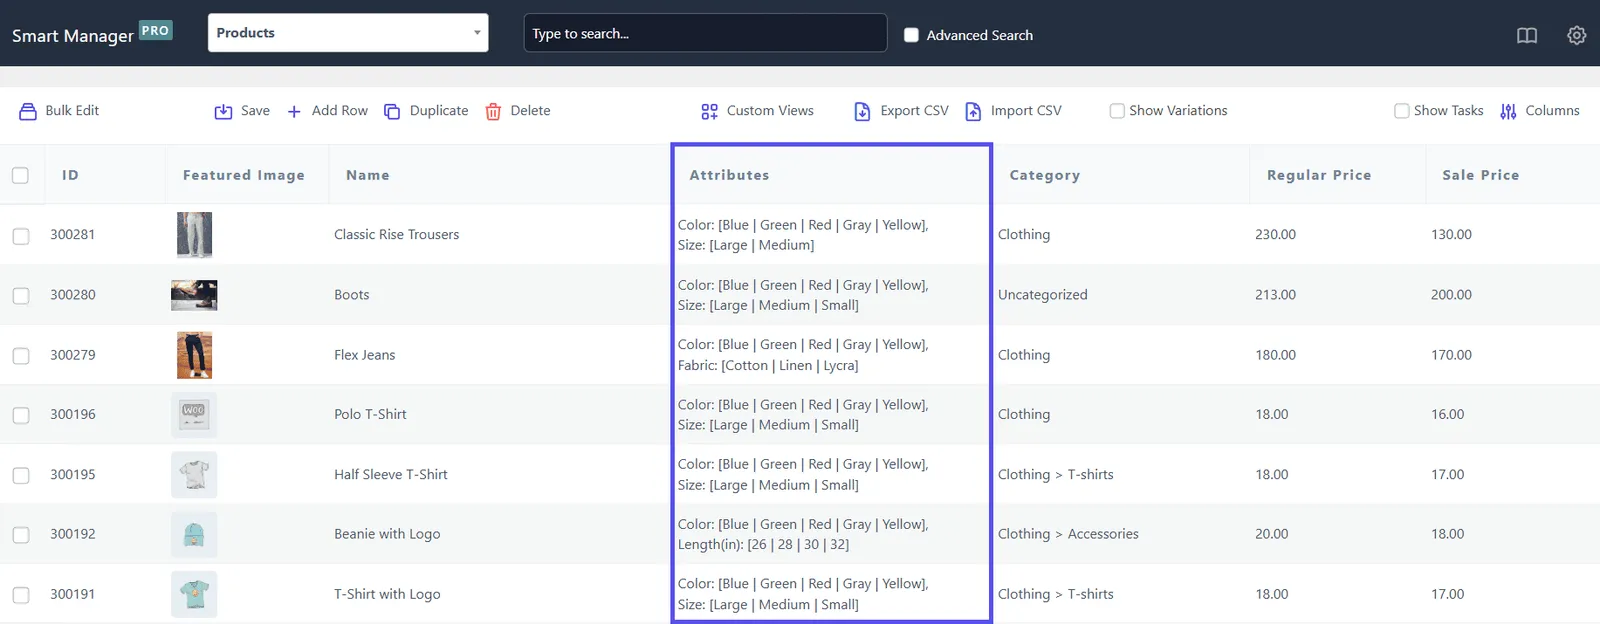
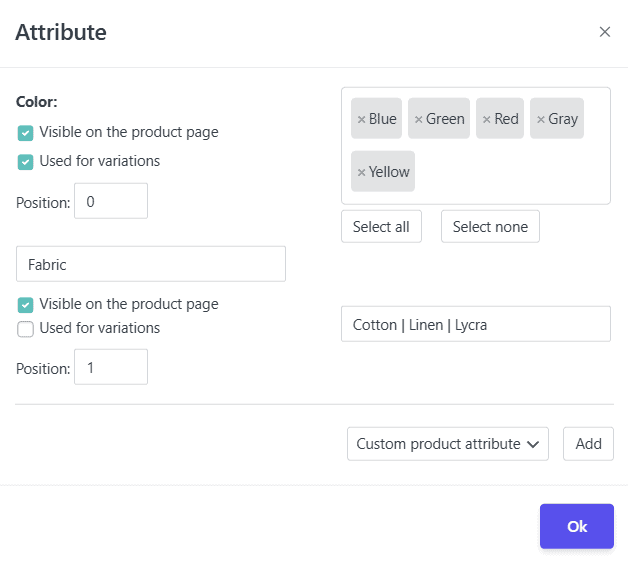
- You can make quick changes using Inline Edit by simply clicking the Attributes cell. This will open a modal with the attributes data where you can add or remove existing product attributes or create custom attributes.
- You can also apply search filters to filter records by price ranges, stock levels, specific attributes (color, size), taxonomy, or SKU patterns, and use the Bulk Edit feature to add/remove attributes across multiple products at once.
For more details on how to Bulk Edit WooCommerce product attributes, refer to this article. 5. Using the Bulk Edit feature, you can also change the attribute values like color, size and all other global product attributes (WooCommerce labels these as “pa_” attributes) for specific variations. For example, set color to “Red” and size to “XL”. 6. Additionally, you can also export product attributes data using the Export CSV functionality.
That’s it. Happy managing!
Note(s):