How to Create Excel-Like Custom Views / Segmented Views
What are custom views?
When you want to analyze only limited yet important data from a ton, Excel provides this mind-blowing benefit. Show / hide data columns, apply filters and save it. This is a custom view.
Similar to Excel, Smart Manager allows you to create custom views for all WordPress custom post types (like WooCommerce products, orders, coupons, users, blog posts, etc.) and all WordPress custom taxonomies (like Product Categories, Product tags, Product Brands, etc.)
Custom views are very useful to view only limited data for the following and any custom post types:
- Products – stock fields like name, regular and sale price, stock quantity, category
- Orders – name, email, address, order status, payment method, line items (products purchased in the order)
- Coupons – coupon code, amount, discount type, validity, usage limit
- Users – name and address, lifetime value, last order date
- Posts / Pages – Title, content, meta description, publish date
Here’s how to create a custom view
- On the Smart Manager Dashboard, select a dashboard from the dropdown (Products in this example).
- Click on the ‘Columns’ button to show/hide the required columns.
- Perform any operation like inline edit, duplicate, apply search filters and bulk edit if required.
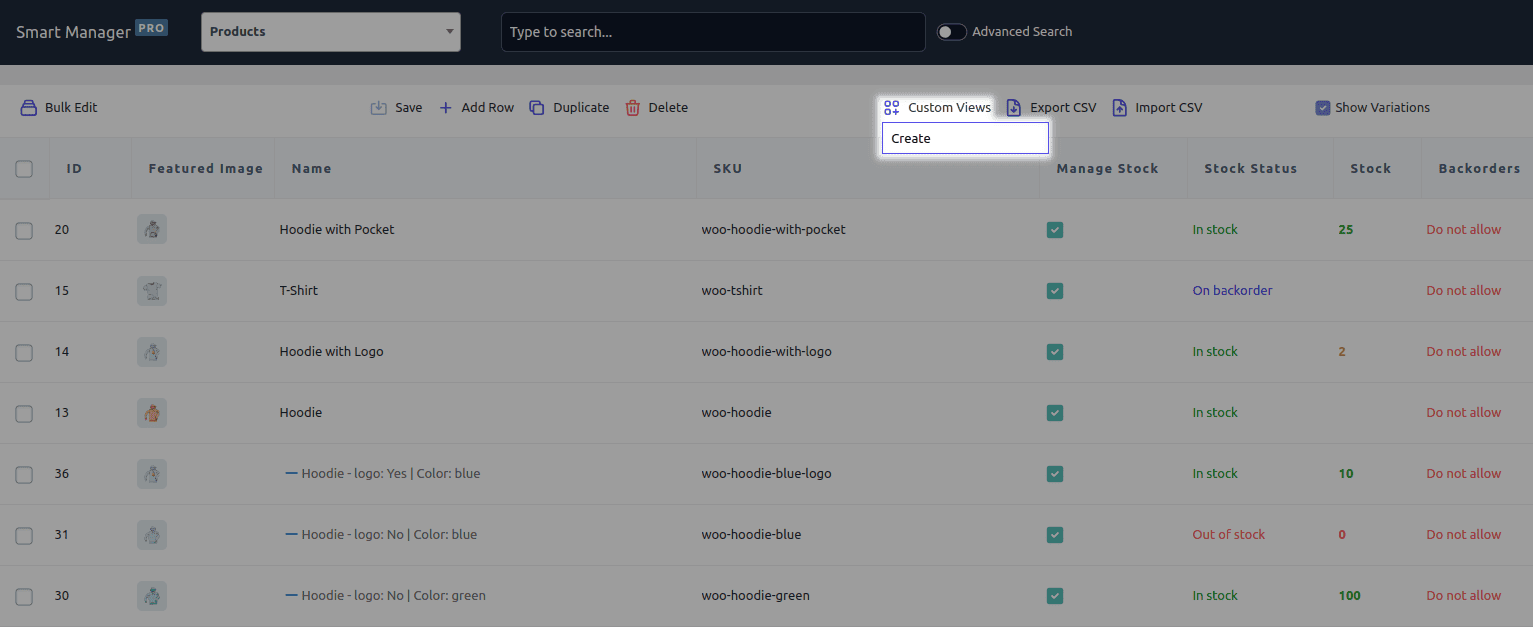
- Hover on the ‘Custom Views’ button at the top of the Smart Manager Navigation bar and click on ‘Create’.
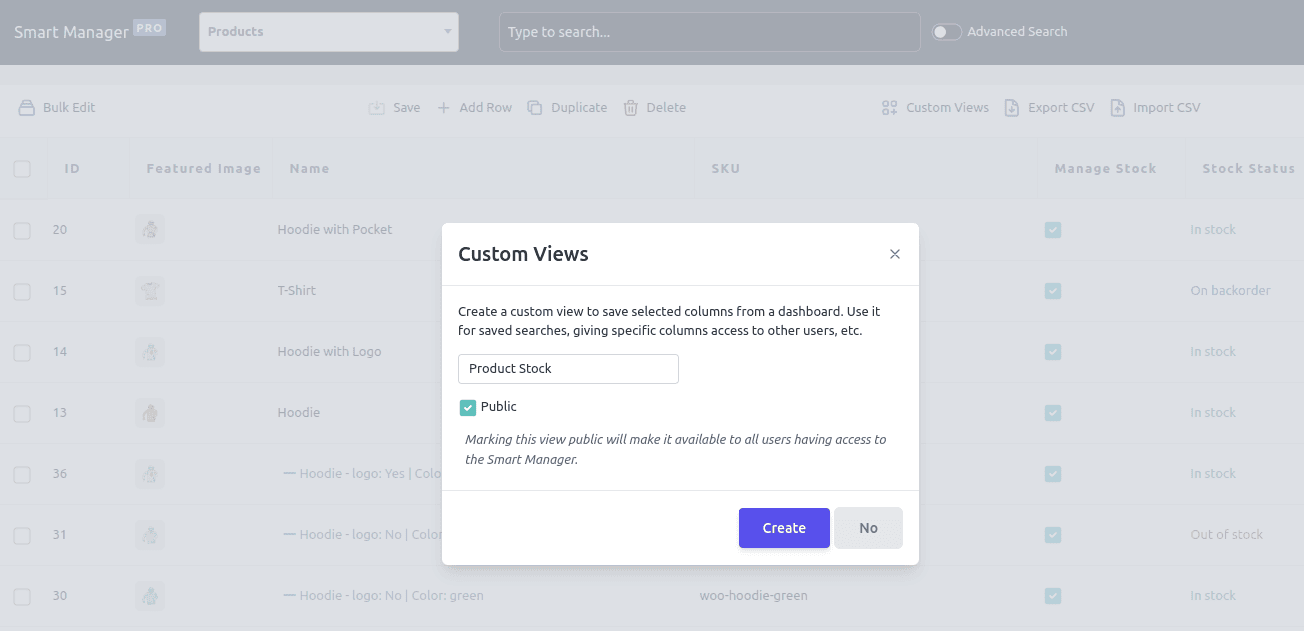
- Choose and add a unique name for the custom view.
- Tick the ‘Public’ checkbox to grant access to anybody having access to that particular post type for this view. If unchecked, only the creator of this view & any user role / particular user granted access to the view can access it.
- Click on Create.
Your custom view is created. Repeat the above steps to create multiple custom views.
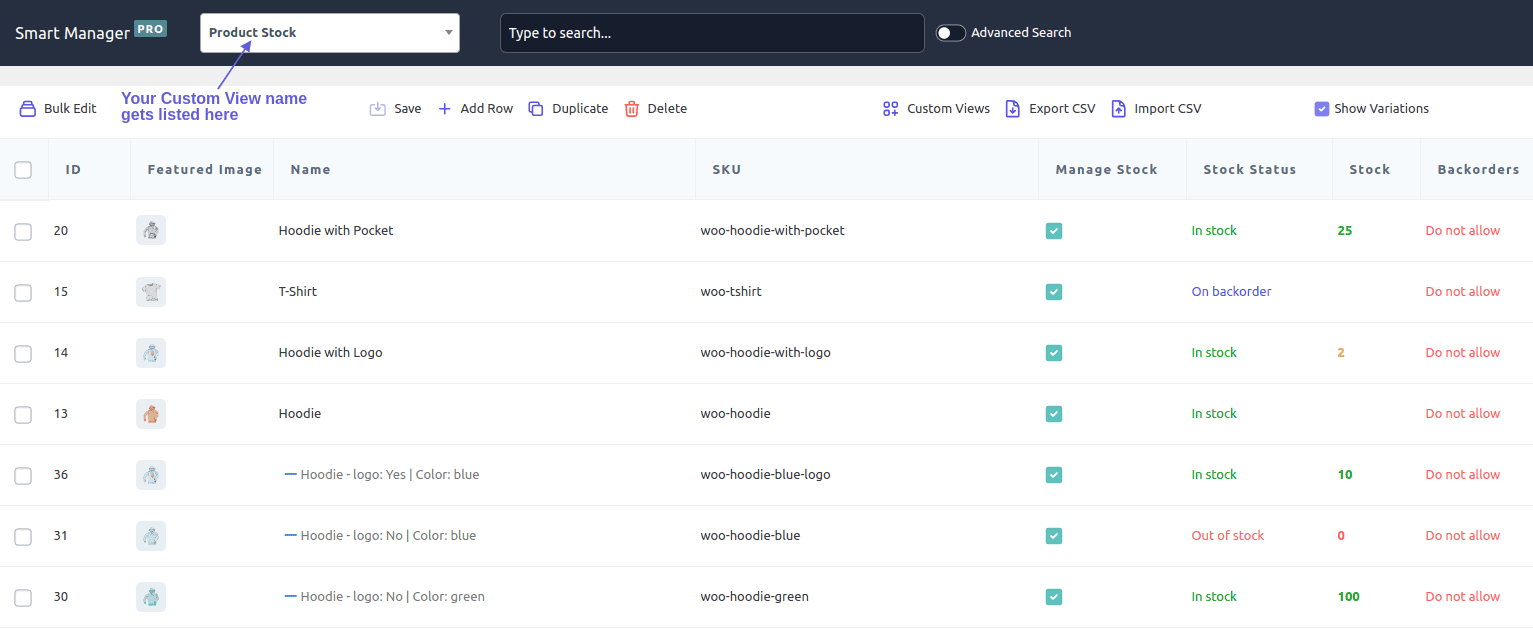
As shown in the image above, we have created a custom view named ‘Product Stock’ with only limited columns.
How to Update / Delete a custom view
Smart Manager automatically arranges all your created custom views in order, with the recent one at the top (under the dashboard dropdown). You will find it under ‘Recently used views’ as well as ‘Other saved views’ (The ones you have created or have access to).
To update an existing custom view
- Select the custom view from the dropdown.
- Show/hide columns, perform edits or other if any.
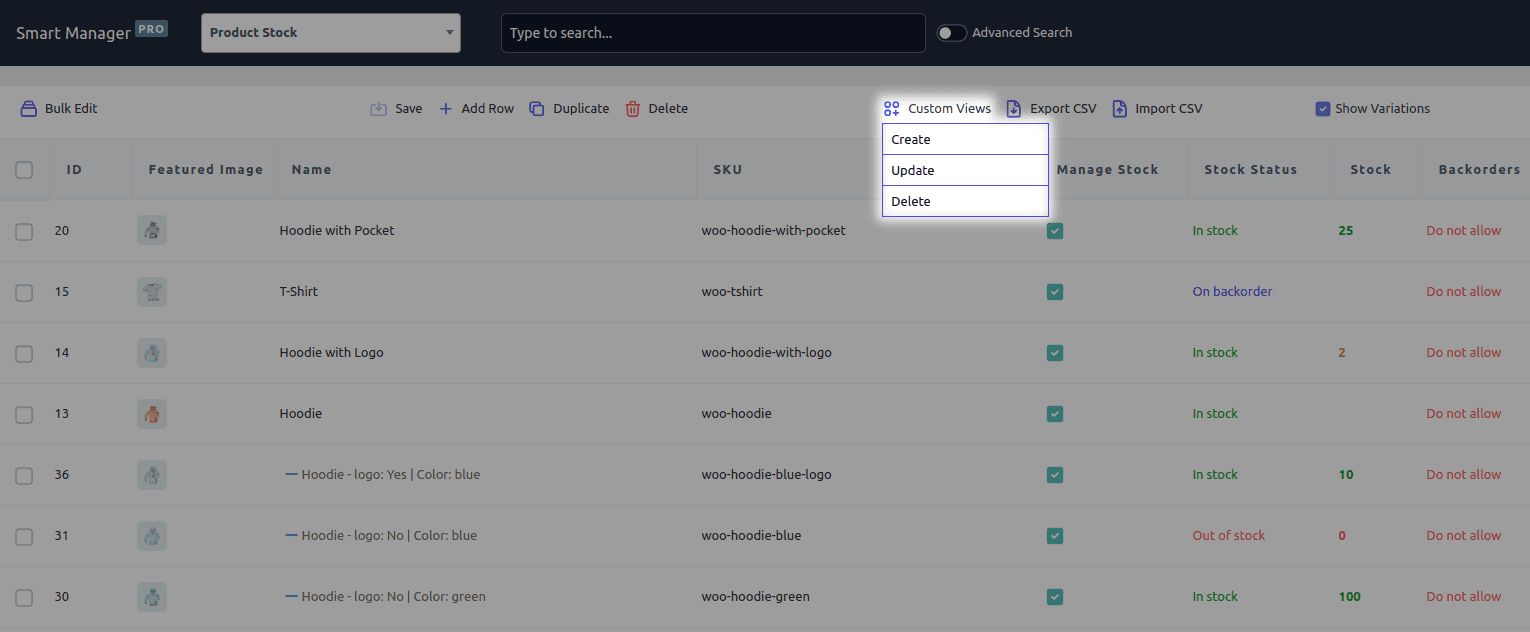
- Hover on the ‘Custom Views’ button and click on the ‘Update’ option.
- It would open a dialog where you can modify the custom view title, change access to the custom view by checking/unchecking the ‘Public’ checkbox. Then Click on the ‘Update’ button.
Your current custom view will be updated.
To delete an existing custom view
- Select the custom view from the dropdown.
- Click on ‘Custom Views’ > Delete and click on the Yes button.
The view will be deleted. Views once delete cannot be restored back.
You can also export data from custom views as CSV by clicking on the ‘Export CSV’ icon.
Note:
- Only the user who created the view can update or delete the view.
- Advanced search conditions cannot be updated in the existing view. To make changes, it’s recommended to create a new view with the updated search conditions.