How to Create, Apply, and Delete Saved Advanced Searches
Smart Manager’s Advanced Search lets you filter data precisely using multiple conditions. However, entering the same conditions repeatedly can be time-consuming.
To save time, you can save your advanced search conditions and reuse them anytime with just a click – instantly accessing your filtered results.
Saved searches based on fields from the core posts table (like post date) are even more powerful—they can be applied across multiple dashboards such as WooCommerce Products, Orders, and more.
Steps to Create Saved Advanced Searches
- Go to the Smart Manager dashboard. Using the top navigation bar, search for and select a dashboard from the dropdown menu. For example, select the
Productsdashboard. - Click the ‘Advanced Search’ toggle to open the panel and enter criteria to filter specific records – for example, WooCommerce products with stock levels below 10.
- Apply your desired search conditions, then click on
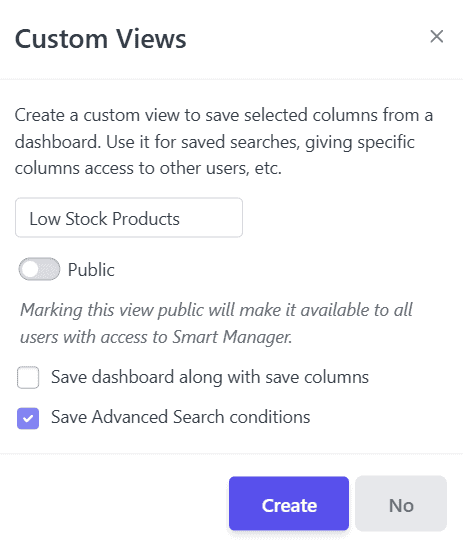
Saveto store the filter for future use. - Clicking on ‘Save’ opens a ‘Custom Views’ create modal where you can enter the following details:
- Enter a name for the saved search.
- Check the
Save Advanced Search conditionsbox. - Toggle the ‘Public’ option if you want other Smart Manager users to access this saved search.
- Click ‘Create’ to save it.
That’s it! Your Saved Search is created and ready to use.
Repeat the steps anytime to create more Saved Searches based on your needs.
Steps to Access and Apply Saved Advanced Searches
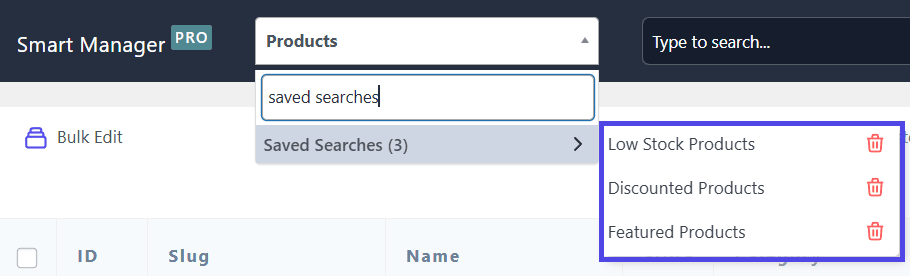
- Go to the Smart Manager dashboard. Using the top navigation bar, search for any of the Saved Searches, or simply scroll through the list under the ‘Saved Searches’ group to find and access the one you need.
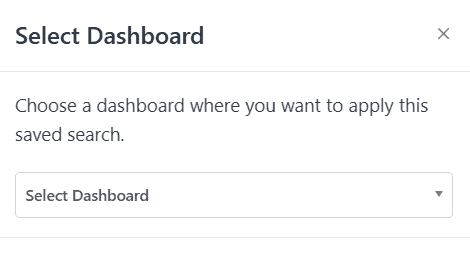
- If the Saved Search includes ‘posts’ table related fields (like Title, Slug, Date, Description, or ID), a pop-up will prompt you to choose which dashboard to apply it to:

- If you select the same dashboard where the Saved Search was created, all conditions will be applied as expected.
- If you select a different dashboard, only basic conditions related to ‘posts’ table related fields (e.g., Title, Slug, ID) will be applied.
Example:
Suppose you create a Saved Search in the Products dashboard with:
Regular Price > 100 and Title contains ‘Shirt’.
If you later open this Saved Search in the Posts dashboard, only the Title contains ‘Shirt’ filter will be applied, because Regular Price is specific to Products and doesn’t exist in Posts.
You can export the entire Saved Search results or just the selected records using the Export CSV functionality.
Steps to Delete Saved Advanced Searches
- Go to the Smart Manager dashboard. Using the top navigation bar, search for any of the Saved Searches, or simply scroll through the list under the ‘Saved Searches’ group to find the one you need.
- Click the delete icon next to the Saved Search title.
- When the confirmation modal appears, click ‘Yes’ to permanently delete the Saved Search.
Note(s):
- Saved Advanced Searches and Export CSV functionalities are available only in the Pro version.