Sarah was this close to checking out. She’d spent 20 minutes browsing: added a linen shirt, a ceramic mug, and a birthday gift for her friend. But then her phone pinged. Her dog barked. Life got in the way.
Later that evening, she opened Instagram. The store she was browsing? Forgotten. The cart? Ghost town.
Sound familiar?
Shoppers like Sarah aren’t saying no. They’re saying not right now.
And if your store doesn’t give them a way to pause and return, you’re not just losing attention, you’re losing revenue.
This comprehensive guide will walk you through everything you need to know about implementing WooCommerce wishlist functionality, from native approaches to the best plugin solutions available in 2025 and its alternatives.
Why does cart abandonment happen (and how wishlists can help)?
Customers love browsing products, but they don’t always buy on the first visit. Common reasons include:
- They’re comparing prices or waiting for a sale.
- An unexpected interruption cuts their session short.
- They hesitate on shipping costs, payment options, or return policies.
- They want to get a second opinion from friends or family.
- They worry it might be an impulse purchase they’ll regret.
Without a mechanism to capture that intent, carts go cold and potential sales slip away.
A wishlist turns fleeting interest into a commitment-friendly pause:
- It acts as a lightweight bookmark, letting shoppers save items without feeling pressured.
- It offloads decision fatigue. Customers can revisit a clean, organized list instead of hunting through old cart items.
- Smart wishlists send gentle nudges via email or notifications when stock runs low, prices drop, or a saved item is back in style.
- They unlock fun features like social sharing, price-threshold alerts, and even progress badges, turning saving into a mini “mood board” experience.
Wishlists are your store’s silent salespeople. They whisper, “You’ll want this later.” And when you make it easy to come back, customers do.
How to set up a wishlist in WooCommerce (with a real store use case)?
Let’s say you run an online skincare store. A customer named Anya visits your shop and falls in love with 10 different products – toners, serums, sheet masks—you name it! But she doesn’t want to buy everything at once.
What does she do?
She clicks Add to Wishlist and saves her faves for later. That’s exactly why setting up a wishlist is a game-changer for your store. It helps customers save their favs, come back later, or even share them with friends.
Here’s how to set up a wishlist in WooCommerce, step-by-step:
Choose the right wishlist plugin
Not all wishlist plugins are built the same. You want something that’s:
- Easy to use (no coding stress)
- Packed with useful features (guest support, social sharing, clean UI)
- Compatible with your WooCommerce setup
Recommended: WooCommerce Wishlists by Element Spark.

It’s built for scale, works smoothly, and comes with pro-level features.
Feature highlights at a glance
- Unlimited wishlists: Customers can create as many lists as they like — perfect for birthdays, holidays, or just future planning.
- Public or private lists: Customers can choose to keep their wishlist private or share it with others.
- Guest wishlist support: Visitors who aren’t logged in can still use the wishlist, with items stored for up to 30 days (or until cookies are cleared).
- Registered user perks: Logged-in customers can save items indefinitely and manage multiple lists.
- Bulk wishlist actions: Add, delete, update, or move items in bulk — great for shoppers building big lists.
- Custom design options: Customize the ‘Add to Wishlist’ text, use brand-specific icons, and swap the button for a link or star.
- Social and direct sharing: Shoppers can share lists through Facebook, Twitter, Pinterest, or a direct link.
- Email reminders: Automatically send reminders for wishlist items to nudge conversions.
- Menu integration: Add wishlist links to any menu supported by your WordPress theme.
- Admin wishlist dashboard: Easily view and manage customer wishlists in your WooCommerce backend.
- Broad product support: Works seamlessly with simple, variable, grouped, and products using Product Add-ons or Gravity Forms Product Add-Ons.
Install and activate your plugin
To install:
- Go to your WooCommerce.com account and download the Wishlists plugin.
- In your WordPress Dashboard, head to:
Plugins > Add New > Upload Plugin - Upload the file you downloaded and click Activate.
Now it’s live.
Configure wishlist settings
- Now go to:
WooCommerce > Settings > Wishlists tab - You’ll see 5 sections. Let’s break them down:
- Wishlist Options
- This section controls how wishlists work on your site.
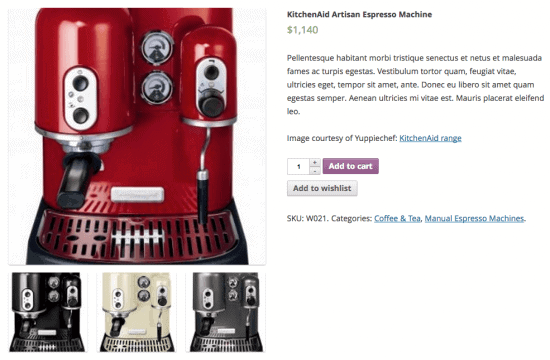
- Allow guests to create lists: Turn this ON if you want people like Anya (who haven’t logged in) to still use the wishlist.
- Message for guests: Want users to log in before using wishlists? Add a message here like Sign in to save your wishlist!
- Redirect to wishlist: Set this to Yes if you want customers to land on their wishlist right after adding a product.
- Button/link type: Choose whether the “Add to Wishlist” appears as a button or a text link.
- Icon: Choose from a Heart or Star icon—or go icon-free if minimal is your vibe.
- Button/link text: You can customize the wording. Try something like “Save for Later” or “Add to My Skin Goals.”
- Quick tip: Customize the message and design so it feels like your brand. A little personal touch goes a long way.
- Wishlist processing options
These control how wishlists behave after actions like purchase.- Automatic Removal: Set this to Yes if you want products to be removed from the wishlist once bought.
- Removal on Order Status: Choose which order status (like “Completed”) triggers automatic removal.
- Pro tip: This helps keep wishlists clean and relevant so users don’t end up with 20 expired items.
- Wishlist Sharing Options
- Sharing = free word-of-mouth marketing.
- Let customers share their lists on Facebook, Twitter, Email, and Pinterest.
- Growth hack: Add a little “Share your wishlist and get 5% off!” banner. It’s subtle but effective.
- Wishlist Style Options
- Time to make it pretty.
- Custom Buttons: Choose your wishlist button and text colors.
- Custom CSS: Want full control? Use CSS to match the wishlist style with your site’s theme.
- Smart tip: Make sure the button pops without being too flashy. A soft blush pink or classic blue usually does the trick.
- Wishlist Page Options
- Here’s where users manage their lists.
- Use these shortcodes on the pages you create:
- My lists page:
[wc_wishlists_my_archive /]– where all lists are stored. - Create a list:
[wc_wishlists_create /]– for making new lists. - Edit a list:
[wc_wishlists_edit /]– for changing list names or deleting items. - Find a list:
[wc_wishlists_search /]– lets users search public wishlists (perfect for gift-giving). - View a list:
[wc_wishlists_single /]]– displays a single wishlist.
- My lists page:
- After all the setup, don’t forget to Save Changes.
- Wishlist Options
Some customers don’t want a full wishlist experience. Maybe they just want to put 1-2 items aside.
Now your shoppers can save and manage their faves anytime.
Align features with your store goals
Wishlists aren’t just cute – they’re strategic.
Here’s what they help you do:
- Reduce abandoned carts by 15–25% (especially during sales)
- Increase average order value—customers return and buy more
- Get early product demand signals before you restock
Plugin pricing:
WooCommerce Wishlists: $89/year
Totally worth it if you’re serious about turning casual scrollers into loyal buyers
So this was about wishlists. But there’s another option that makes your buyers be in touch with their carts. It’s Save For Later.
Moreover, not all store owners offer a wishlist. Some store owners prefer this alternative. It also allows customers to put their favorite products aside and purchase later.
Wishlist vs Save For Later: who’s the real MVP?
Okay, picture this:
You’re browsing your favorite online store at 2 AM (as one does), sipping tea, and seeing the perfect denim jacket. But your brain says, Wait. Let’s check if it’s cheaper elsewhere or if a sale’s coming.
So what do you do? Add to Wishlist?
Or hit Save for Later?
Let’s break it down like a fun game show.
Wishlist: your dream cart
Think of this like Pinterest for your shopping cart. A wishlist is where you collect all the “someday” things — stuff you love, but you’re not ready to buy just yet.
Example:
You love a $200 designer handbag but want to wait until the holiday sales. Add it to the wishlist, and it’s safe and sound until then.
The catch? You usually have to sign up or log in. And sometimes, you forget it even exists (guilty as charged).
Save for Later: the sneaky checkout ninja
This one lives inside your cart. It’s like putting an item on the bench — not playing the game yet, but ready to jump in at any moment.
It’s like you add a wireless headphone to your cart but pause because your salary hasn’t hit yet. Hit Save for Later, and it chills in the cart, silently judging your spending habits.
Here’s why Save for Later is a lowkey legend:
- Instant Reminder Vibes: Unlike wishlists, you don’t forget these babies. They live in your cart, right where the action happens.
- Buy Me Now Energy: Seeing them in the cart is like your products whispering, “Hey… wanna check me out today?”
- More Sales, Baby: Cart pages are where the magic (and money) happens. You can upsell, cross-sell, and work your marketing charm right there.
- No Sign-Up Stress: Nope, no login walls. Just save and go.
- Big Flex Mode: Want three of the same tees in different colors? No problem. Save them in bulk with quantities. Gifting season? Handled.
Bonus: data goldmine
Save for Later isn’t just for buyers — it’s a juicy intel tool for you too.
People tend to save the stuff they actually want. Which means?
You get solid clues about what’s converting — perfect for personalized marketing.
Verdict?
Wishlist is cute and sentimental. But Save for Later is tactical, fast, and pushes people closer to hitting Buy Now.
So if you’re running a WooCommerce store and want to gently push customers toward checkout (without being pushy), Save for Later is your secret weapon.
Want it in your store?
There’s a killer plugin for that. Just scroll down and check it out!
StoreApps Save for Later for WooCommerce
Ever shopped like you’re making a wishlist in your head?
You see a cute dress, add it to your cart, but you’re not quite ready to check out. Maybe you’re waiting for payday, or still deciding between colors. That’s where Save for Later by StoreApps steps in like your personal shopping assistant.

Here’s how it works:
It’s like giving your cart a snooze button. Once you install the plugin, the “Save for Later” feature is automatically activated on your WooCommerce store. No settings, no coding, and no login or account needed.
With this plugin:
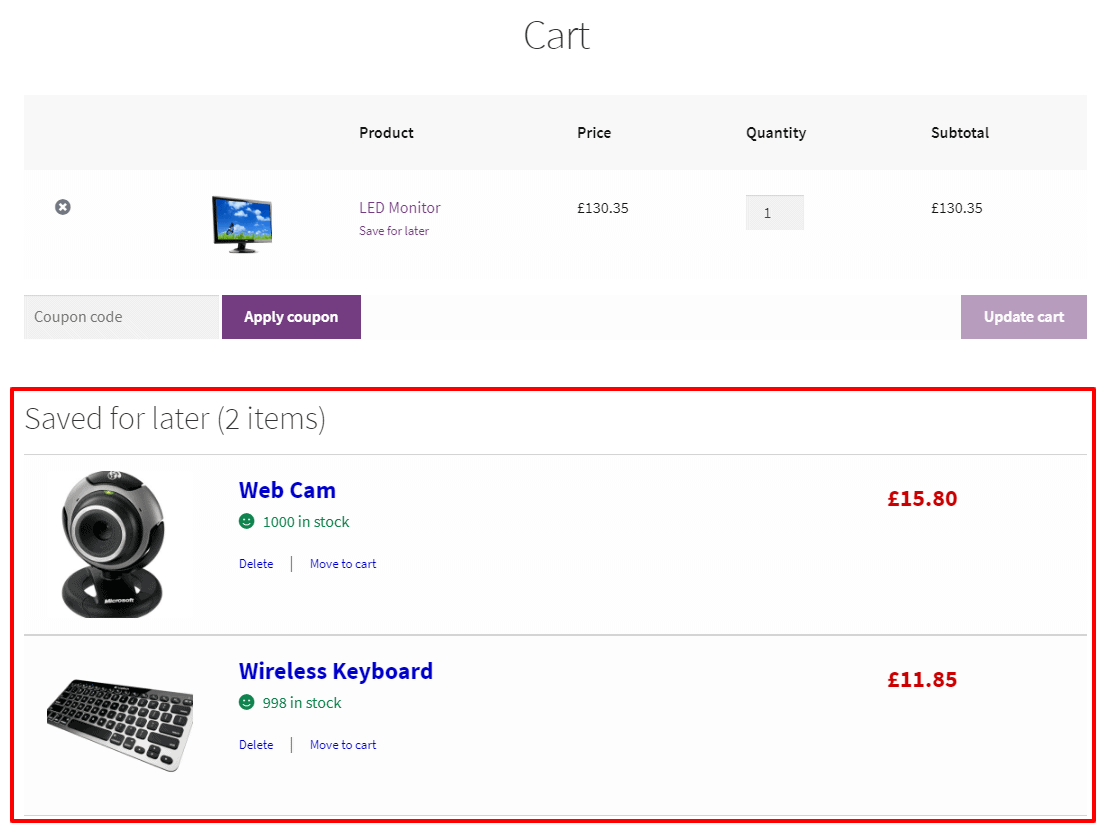
- A Save for Later link magically shows up right under every product in your cart — no setup stress, it just works.
- Both guests and logged-in users can use it; so even if you don’t have an account, your choices stick around.
- You can move stuff back and forth between the cart and Save for Later as many times as you want. Like a fashion show for your cart.
- Works with simple and variable products – whether it’s one pair of shoes or 3 sizes of them.
- Your saved goodies stay visible on the cart page, even if the cart is empty. No awkward where’d it go? moment.
- Feeling generous? You can even share your saved items on social media like hey, hint hint.
Basically, it turns your cart into a wishboard. One click. No pressure. And you don’t lose track of the things you liked.
Pricing: $49/year
Get Save for Later for WooCommerce
Don’t just let customers dream, let them come back and buy
Let’s be real. Both wishlists and save for later features bring value to a WooCommerce store. But if you’re serious about turning casual browsers into paying customers, Save for Later gives you the edge.
Why? Because it’s not just about bookmarking products for someday. It’s about nudging customers to come back, complete their purchase, and boost your bottom line. It’s conversion-focused, effortless to use, and works whether your customer is logged in or not.
That said, don’t sleep on wishlists either. They’re great for visibility and long-term engagement. If your budget allows, using both tools can cover all bases: impulse buys and slow burns.
Bottom line? This article broke it all down for you, plain and simple. Now it’s your move. Choose the tools that actually move the needle, not just the ones that look nice.
