
The most important aspect of a successful thank you page is making sure people see it.
The need for a thank you page may or may not be limited to being fancy or complicated. It just needs to make a good first impression by standing out from the rest of the site.
This article will provide you with a general tutorial on how to customize WooCommerce thank you page or order received page using code.
Why should you customize the WooCommerce thank you page?
The order received page helps you stay in touch with your customers after their purchase, and is a subtle way to say – thanks for your order.
You may overlook the importance of your purchase confirmation page, or thank you page in your online store. Rather it’s a crucial part of the sales process.
The default WooCommerce thank you page may come across as boring and a dead end for customers. Customers might get confused about what to do next, while businesses might get caught in a rut about how to make the page look better.
Rather than leaving it to its original state, if you customize it, you can:
- Add onboarding instructions that lead to the next steps.
- Promote related products via cross-selling and upselling.
- Use coupons to encourage repeat purchases.
- Provide valuable resources to customers.
- Engage customers with social proof, videos, etc.
In that case, let’s see how we can easily create and edit WooCommerce order pages using code.
We are sure it will be super beneficial for all the developers out there!
Customize WooCommerce thank you page with code
There are three ways to customize WooCommerce thank you page or order received page using code:
- Creating a redirect
- Using filters
- Overwriting template files
Also, keep this post on safely adding code to the file open in another tab for reference.
Let’s check out all three ways in detail.
Customizing the thank you page by creating a redirect
It is simple to redirect by creating a new plugin or opening the file functions.php and entering the following code to the end of the file.
add_action( 'template_redirect', 'sa_custom_redirect_after_purchase' );
function sa_custom_redirect_after_purchase() {
	global $wp;
	if ( is_checkout() && !empty( $wp->query_vars['order-received'] ) ) {
		wp_redirect( 'https://demo.storeapps.org/woocommerce/thank-you/' );
		exit;
	}
}
Here’s the custom thank you page after placing an order.
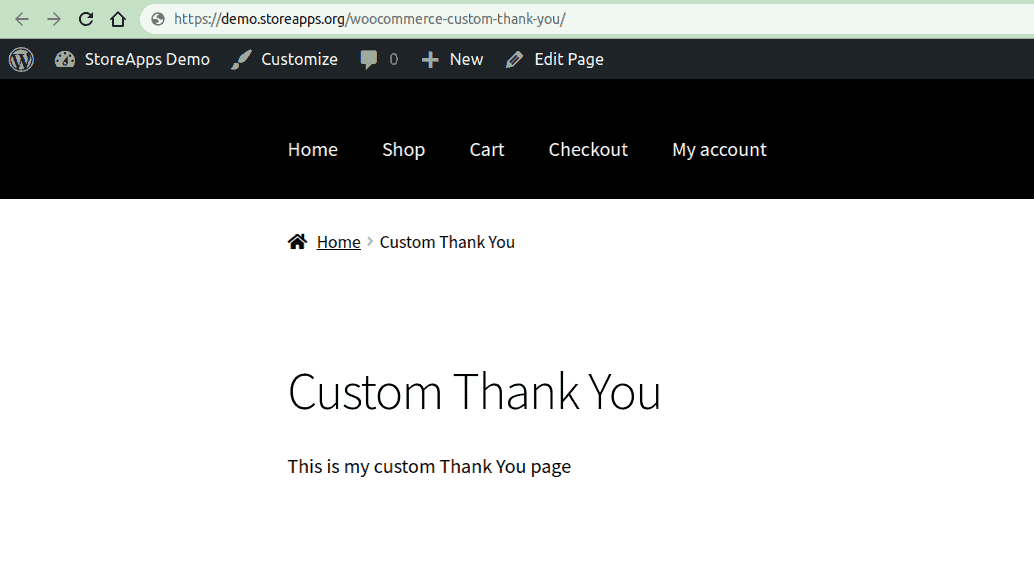
Redirecting seems good, but this is missing important things such as the order summary table, billing and shipping details and other important information that WooCommerce currently provides.
Customizing the thank you page using filters
Instead of creating it from scratch, you may want to customize WooCommerce thank you page by changing the page title or changing some text before the order information. In such cases, you can use filters.
Changing the thank you page title
add_filter( 'the_title', 'sa_title_order_received', 10, 2 );
function sa_title_order_received( $title, $id ) {
if ( function_exists( 'is_order_received_page' ) && is_order_received_page() && get_the_ID() === $id ) {
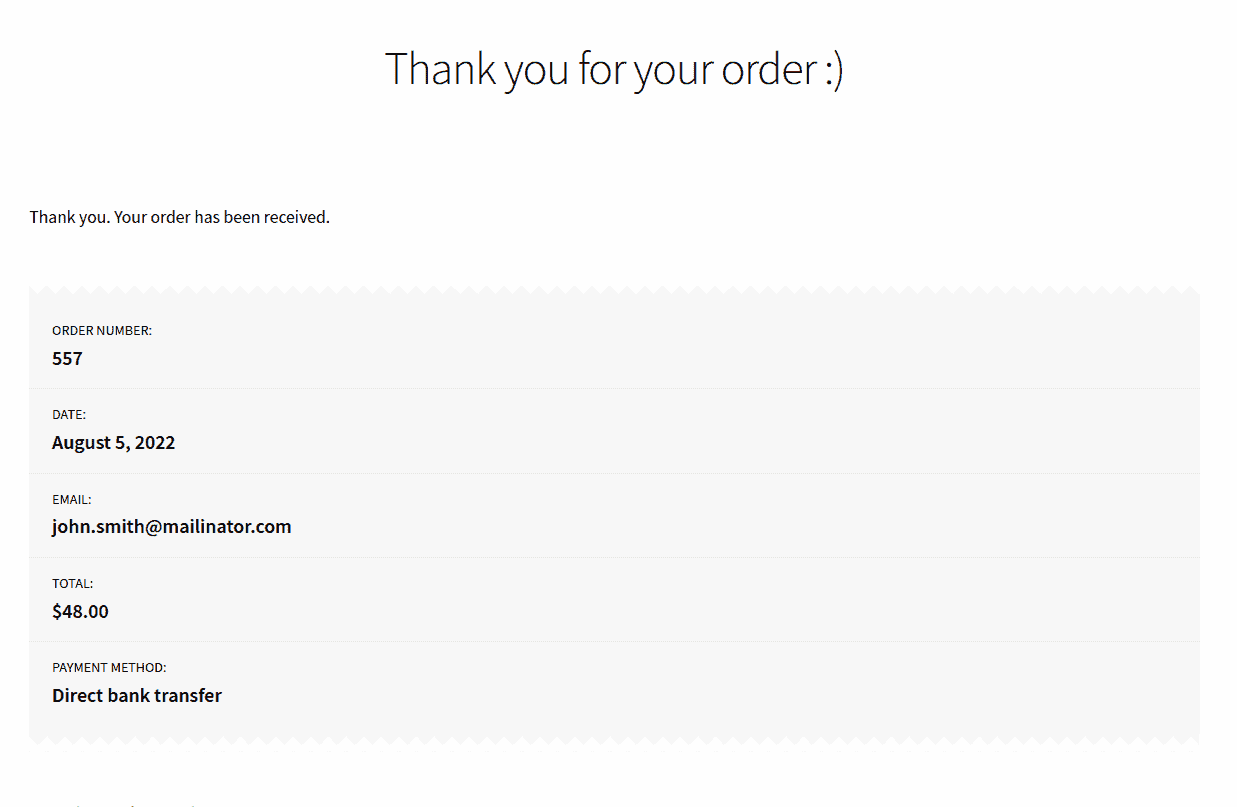
$title = "Thank you for your order :)";
}
return $title;
}
WooCommerce provides the function is_order_received_page() in includes/wc-conditional-functions.php file. This is how the changed title would appear:
Personalizing the thank you page title
You can do this to include the customer’s name in the title or anything else.
add_filter( 'the_title', 'sa_personalize_order_received_title', 10, 2 );
function sa_personalize_order_received_title( $title, $id ) {
if ( is_order_received_page() && get_the_ID() === $id ) {
global $wp;
// Get the order. Following lines are present in order_received() in includes/shortcodes/class-wc-shortcode-checkout.php file
$order_id = apply_filters( 'woocommerce_thankyou_order_id', absint( $wp->query_vars['order-received'] ) );
$order_key = apply_filters( 'woocommerce_thankyou_order_key', empty( $_GET['key'] ) ? '' : wc_clean( $_GET['key'] ) );
if ( $order_id > 0 ) {
$order = wc_get_order( $order_id );
if ( ! $order || ! hash_equals( $order->get_order_key(), $order_key ) ) {
$order = false;
}
}
if ( $order instanceof WC_Order ) {
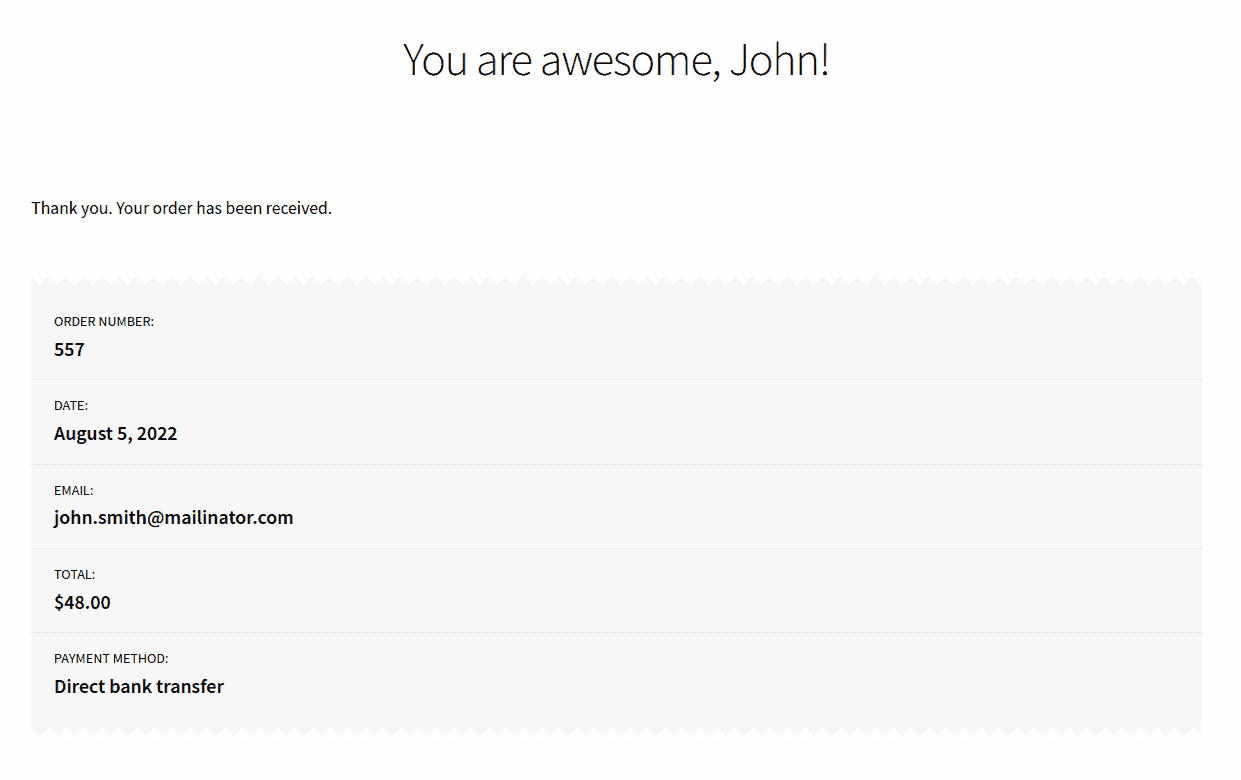
$title = sprintf( "You are awesome, %s!", esc_html( $order->get_billing_first_name() ) );
}
}
return $title;
}
This will look like this:
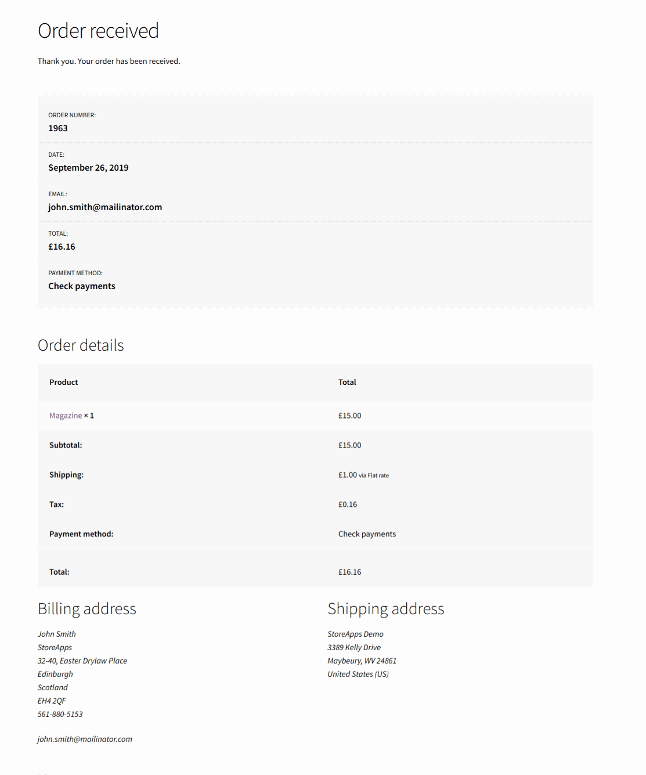
Customizing the text before order information
The default text shown before the order information is “Thank you. Your order has been received.”.
This text comes from the file templates/checkout/thankyou.php. You can change this text using a filters available in WooCommerce which is woocommerce_thankyou_order_received_text.
add_filter( 'woocommerce_thankyou_order_received_text', 'sa_update_order_received_text', 10, 2 );
function sa_update_order_received_text( $text, $order ) {
	$text .= 'We have emailed the order receipt to you.';
	return $text;
}
This code will append the text “We have emailed the order receipt to you.” to the existing text.

If you want to overwrite the text completely, you must avoid concatenating the $text variable.
$text = 'We have emailed the purchase receipt to you.';
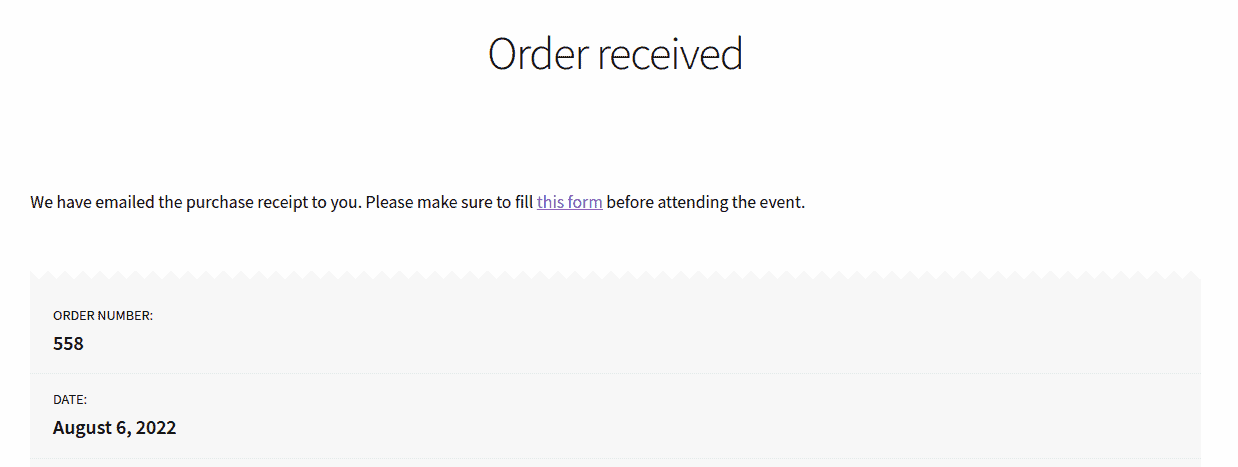
If you want to add instructions here that need the customer to download a form, you can do that too.
add_filter( 'woocommerce_thankyou_order_received_text', 'sa_change_order_received_text', 10, 2 );
function sa_change_order_received_text( $text, $order ) {
	$text = 'We have emailed the purchase receipt to you. Please make sure to fill <a href="https://demo.storeapps.org/form.pdf">this form before attending the event.';
	return $text;
}
This will look like this:
Customizing the thank you page: overwriting WooCommerce template files
WooCommerce shows the contents of the thank you page from the thankyou.php template file that can be found in woocommerce/templates/checkout/ folder.
You may require PHP knowledge if you want to choose this method to modify the thank you page.
You can use your template by copying the thankyou.php file to your theme’s folder in a similar folder structure.
For example, if you are using the Storefront theme, then your thankyou.php should be copied to:
wp-content/themes/storefront/woocommerce/checkout/ folder. You must create the two folders, ‘woocommerce’ & ‘checkout’.
When WooCommerce finds the same template is present in your theme, then priority is given to the template present in your theme.
Let’s take an example. On the WooCommerce default thank you page, the payment method is shown in the beginning and in the order details.
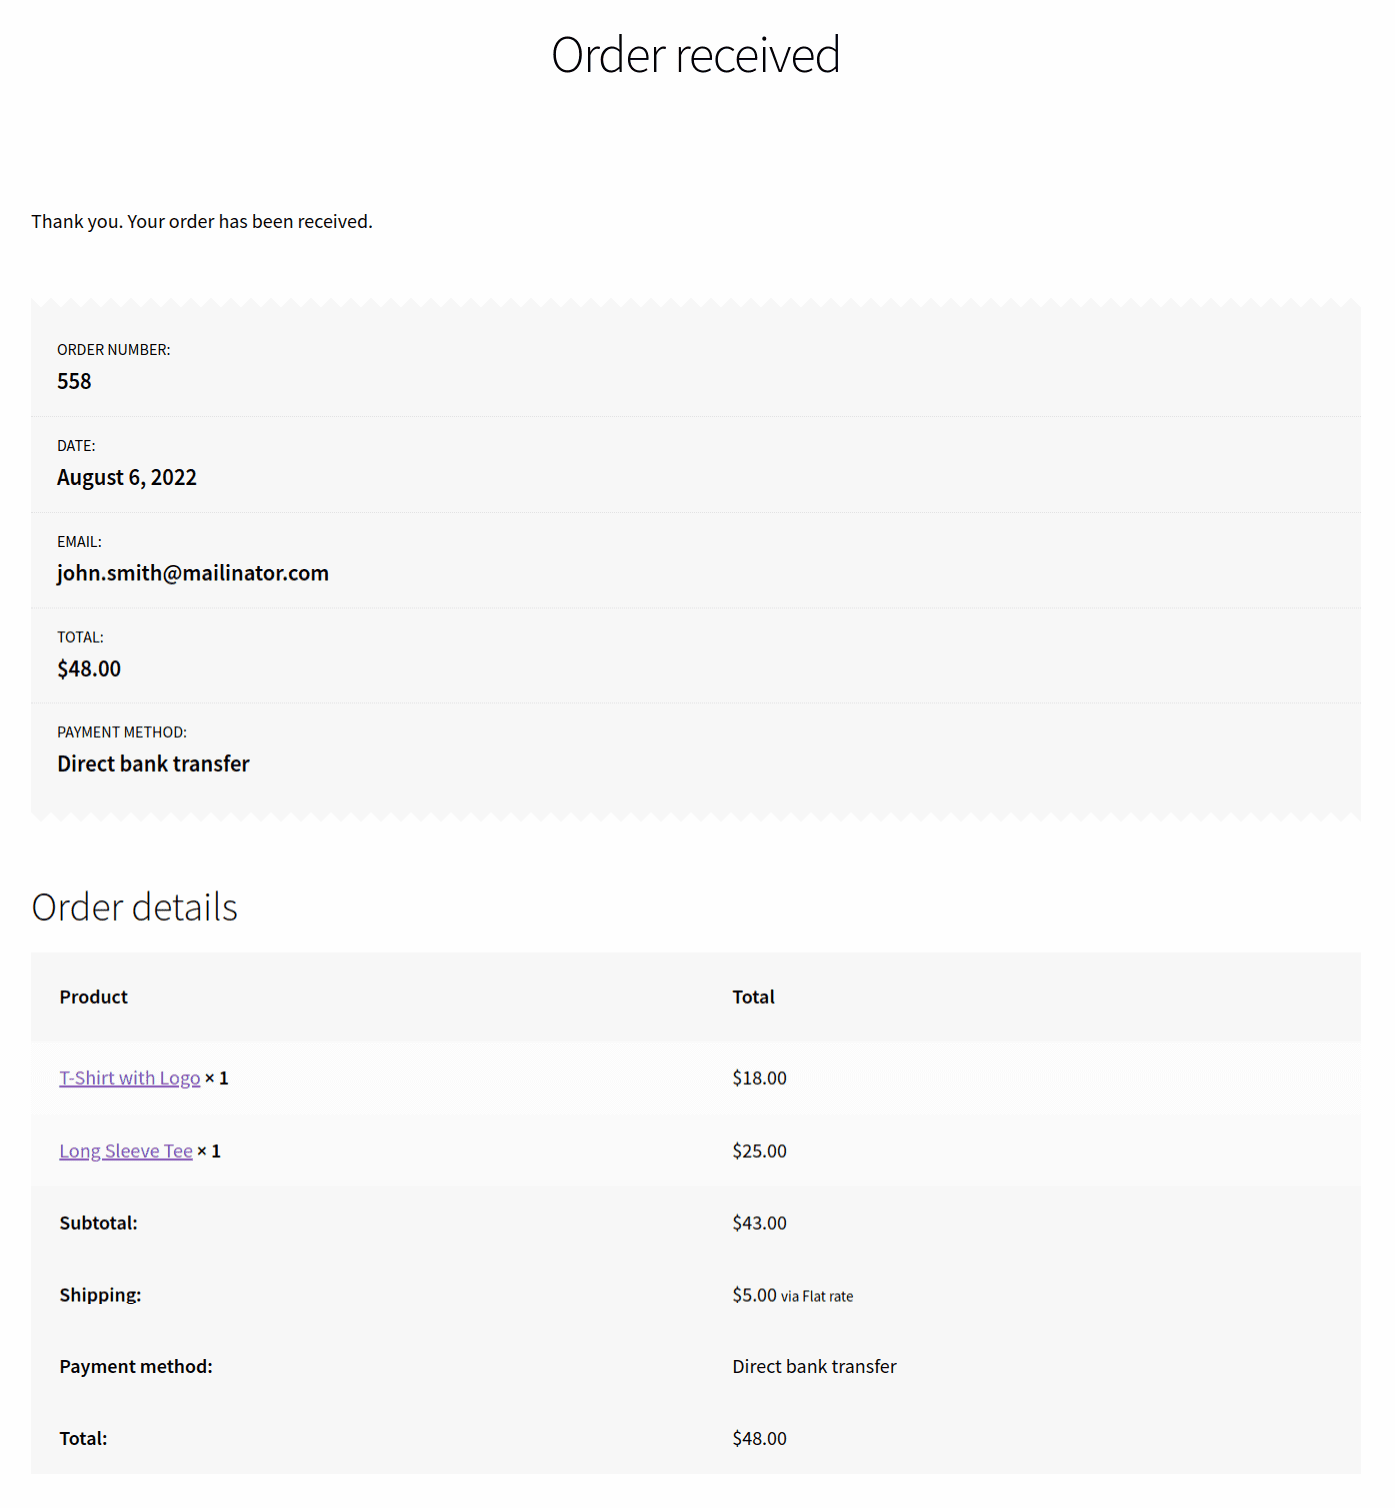
We want to provide a coupon code to the customer for their next purchase & remove the payment method from the top section.
Below is the thankyou.php template:
<?php
if ( ! defined( 'ABSPATH' ) ) {
exit;
}
?>
<div class="woocommerce-order">
<?php if ( $order ) : ?>
<?php if ( $order->has_status( 'failed' ) ) : ?>
<p class="woocommerce-notice woocommerce-notice--error woocommerce-thankyou-order-failed"><?php _e( 'Unfortunately your order cannot be processed as the originating bank/merchant has declined your transaction. Please attempt your purchase again.', 'woocommerce' ); ?></p>
<p class="woocommerce-notice woocommerce-notice--error woocommerce-thankyou-order-failed-actions">
<a href="<?php echo esc_url( $order->get_checkout_payment_url() ); ?>" class="button pay"><?php _e( 'Pay', 'woocommerce' ) ?>
<?php if ( is_user_logged_in() ) : ?>
<a href="<?php echo esc_url( wc_get_page_permalink( 'myaccount' ) ); ?>" class="button pay"><?php _e( 'My account', 'woocommerce' ); ?>
<?php endif; ?>
</p>
<?php else : ?>
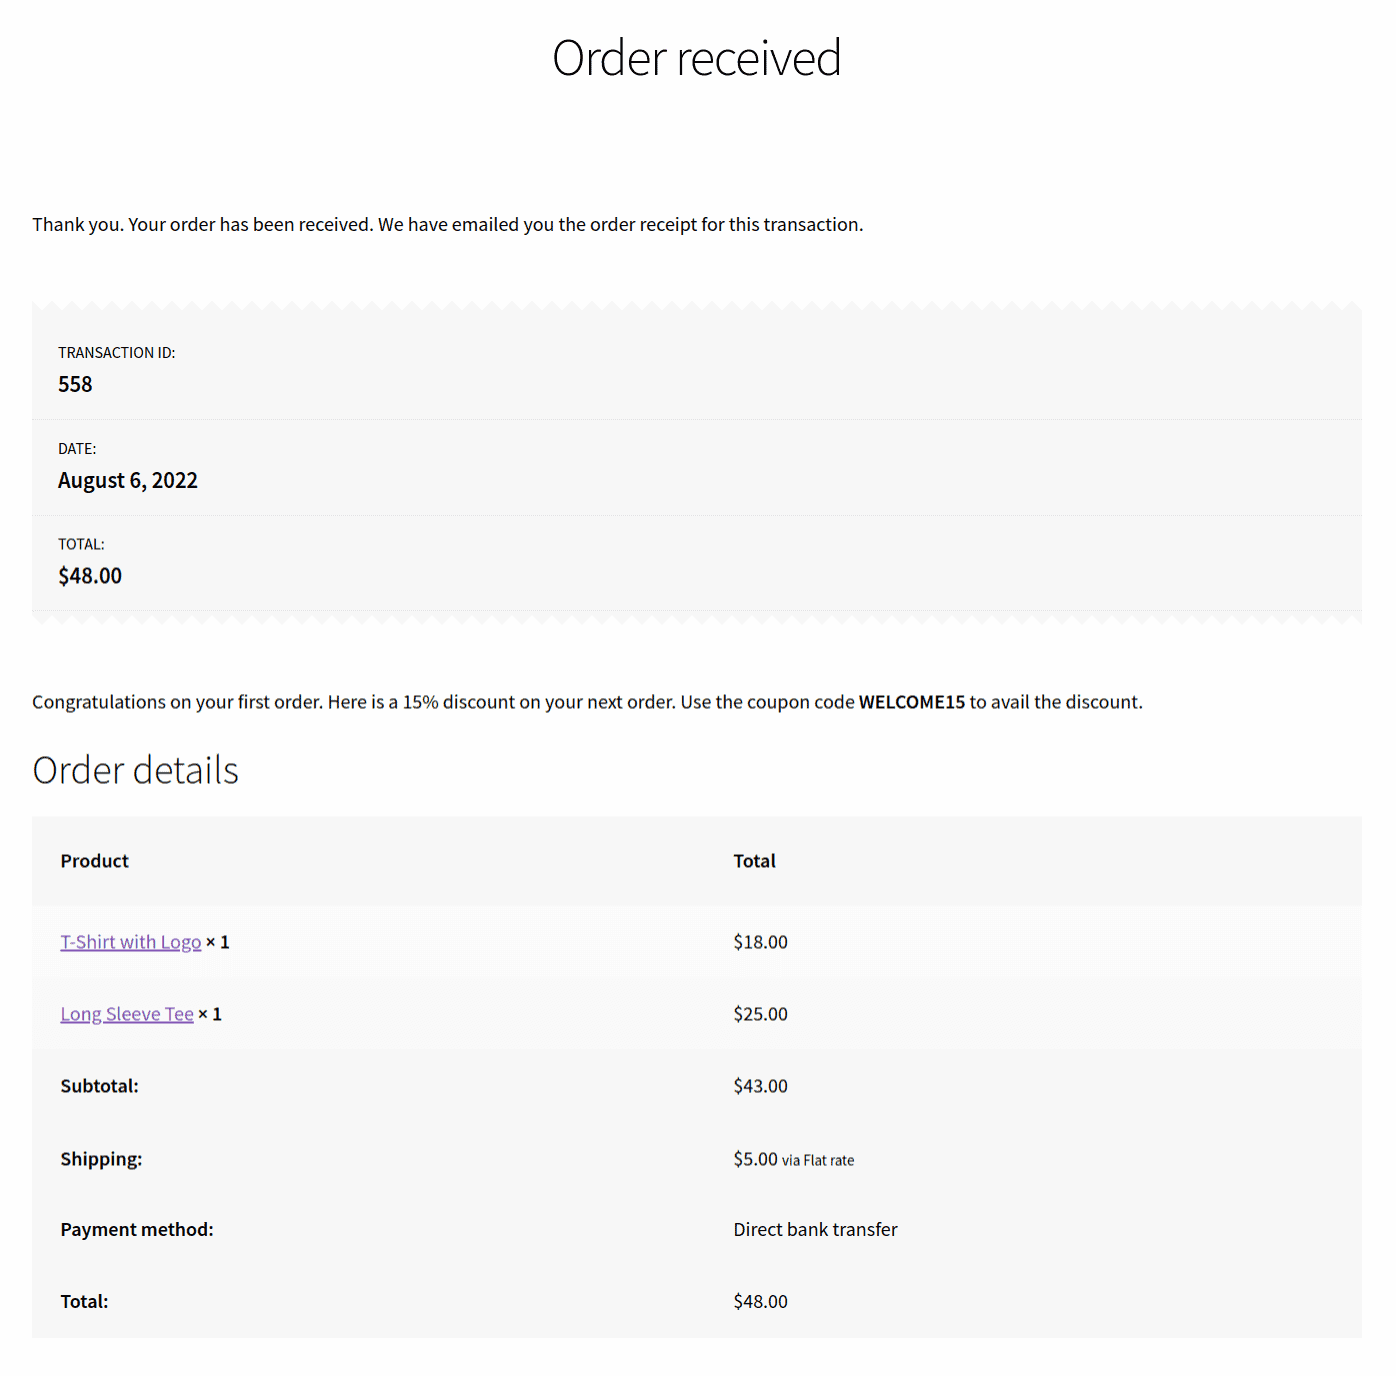
<p class="woocommerce-notice woocommerce-notice--success woocommerce-thankyou-order-received"><?php echo apply_filters( 'woocommerce_thankyou_order_received_text', __( 'Thank you. Your order has been received. We have emailed you the order receipt for this transaction.', 'woocommerce' ), $order ); ?></p>
<ul class="woocommerce-order-overview woocommerce-thankyou-order-details order_details">
<li class="woocommerce-order-overview__order order">
<?php _e( 'Transaction ID:', 'woocommerce' ); ?>
<strong><?php echo $order->get_order_number(); ?></strong>
</li>
<li class="woocommerce-order-overview__date date">
<?php _e( 'Date:', 'woocommerce' ); ?>
<strong><?php echo date_i18n( get_option( 'date_format' ), $order->get_date_created() ); ?></strong>
</li>
<li class="woocommerce-order-overview__total total">
<?php _e( 'Total:', 'woocommerce' ); ?>
<strong><?php echo $order->get_formatted_order_total(); ?></strong>
</li>
</ul>
<?php endif; ?>
<p>Congratulations on your first order. Here is a 15% discount on your next order. Use the coupon code <strong>WELCOME15</strong> to avail the discount.</p>
<?php do_action( 'woocommerce_thankyou_' . $order->get_payment_method(), $order->get_id() ); ?>
<?php do_action( 'woocommerce_thankyou', $order->get_id() ); ?>
<?php else : ?>
<p class="woocommerce-notice woocommerce-notice--success woocommerce-thankyou-order-received"><?php echo apply_filters( 'woocommerce_thankyou_order_received_text', __( 'Thank you. Your order has been received.', 'woocommerce' ), null ); ?></p>
<?php endif; ?>
</div>
You might want to change the data shown in the order details table & the customer details (when logged in).
Those are coming from another file. WooCommerce uses a function woocommerce_order_details_table() that is attached to the woocommerce_thankyou hook.
The function woocommerce_order_details_table() is defined in includes/wc-template-functions.php file.
The thank you page is a collection of four different template files:
- templates/checkout/thankyou.php
- templates/order/order-details.php
- templates/order/order-details-item.php
- templates/order/order-details-customer.php
Once you know what data is coming from which template, you just need to copy the right template to your theme’s folder & that’s all.
Now, let’s see how to customize the WooCommerce thank you page for a product variation.
How to redirect to a custom thank you page based on variation ID using a hook?
add_action( 'woocommerce_thankyou', 'sa_redirect_product_attribute_based', 10, 1 );
function sa_redirect_product_attribute_based( $order_id ) {
	$order = wc_get_order( $order_id );
	if ( $order instanceof WC_Order ) {
		foreach( $order->get_items() as $item ) {
			// Add whatever variation id you want below here
			if ( !empty( $item[ 'variation_id' ] ) && 446 == $item[ 'variation_id' ] ) {
				// change below to the URL that you want to send your customer to
				wp_redirect( 'https://demo.storeapps.org/custom-thank-you/' );
			}
		}
	}
}
Print text on the thank you page based on product attribute
Extending the above example, you can also display any custom text on the WooCommerce thank you page based on the variation ID. Here’s the code for it:
add_action( 'woocommerce_thankyou', 'sa_show_custom_text_by_variation_id', 10, 1 );
function sa_show_custom_text_by_variation_id( $order_id ) {
	$order = wc_get_order( $order_id );
	if ( $order instanceof WC_Order ) {
		foreach( $order->get_items() as $item ) {
			// Add whatever variation id you want below here. My attributes are Color, Size
			if ( !empty( $item[ 'variation_id' ] ) && 446 == $item[ 'variation_id' ] ) {
				echo '<p>Do not hesitate to reach out to us in case you want to exchange the T-shirt for a different size.</p>';
			}
		}
	}
}
When you add the code, the thank you page will look like this:

That’s quite a lot of code snippets here. If you are not into coding and want an easy solution, read below to discover a powerful plugin.
WooCommerce custom thank you page per product and sitewide
Customizing the thank you page involves a lot of elements. A small mistake you make while adding the code snippet and everything goes haywire.
Therefore if you want to focus more on your sales and marketing and save yourself from the coding hassles, we suggest using the Custom Thank You Page for WooCommerce plugin.
It helps you set up a WooCommerce custom thank you page per product as well as sitewide.
A thank you page optimized with this plugin allows you to upsell (using Smart Offers plugin), build an email list (using Icegram plugins), promote your offers, collect feedback, show a video message, coupons and do more things.
Your default WooCommerce thank you page will convert into a powerful marketing tool.
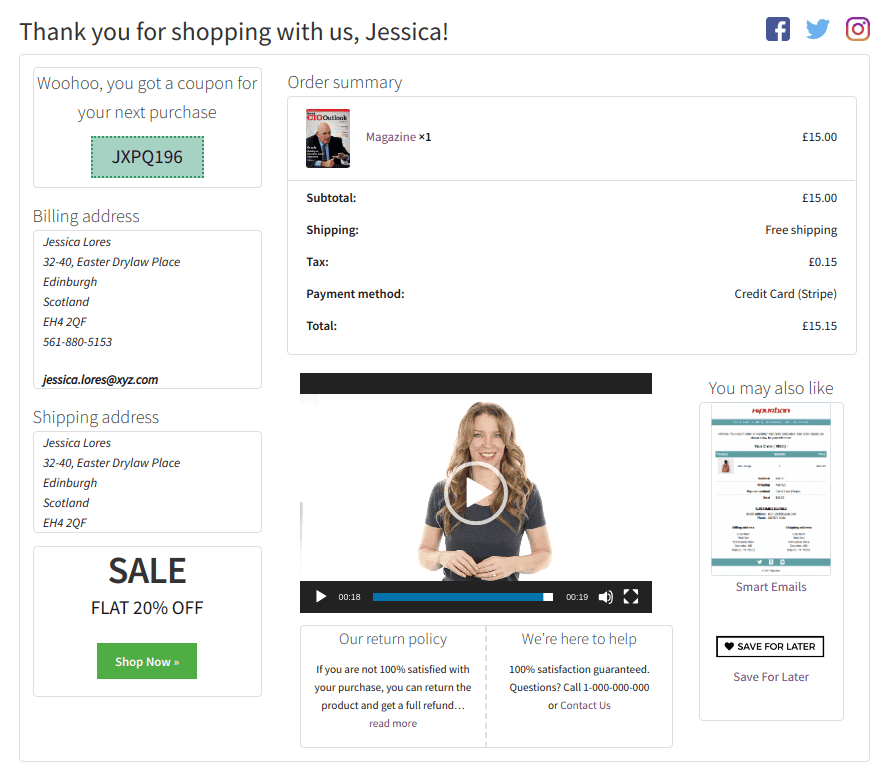
Here are some more plugin features:
- Four readymade high-converting thank you page templates to help you get started with a bang.
- Redirect users after purchase to affiliate links, third-party links or other resources.
- Allows you to build the thank you page as per your favorite theme, plugins, and page editors & design the page the way you desire.
Other plugins to customize thank you page
The market continues to be flooded with plugins that promise to deliver holistic solutions. But gaps continue to linger and problems will still be unaddressed.
However, StoreApps Custom Thank You page plugins stands out because of its quality code, support, its compatibility with other plugins, and a lot more!
Check out other WooCommerce thank you page plugins below.
Custom Thank You Pages for WooCommerce
This plugin allows you to create custom thank you pages for each product in your WooCommerce store which helps drive sales and build customer loyalty.
Key features:
- Show related products.
- Upsell to your customers.
- Helps offer an amazing onboarding experience.
- Get more newsletter subscribers.
Pricing: $49 (annually)
Get Custom Thank You Pages for WooCommerce
Thank You Page for WooCommerce
The plugin helps you enhance your store by allowing WooCommerce customization and redirecting customers to a personalized thank you page after they have completed a successful purchase. What makes the plugin even more credible is its 10,000+ active installations.
Key features:
- Allows crafting a bespoke thank you message, specific to your objective and product.
- Ability to make separate pages for each product.
- Allows all functionalities of a thank you page but for a WordPress multisite as well.
- Functionality to set a global thank you page for the customers.
Get Thank You Page for WooCommerce
Conclusion
We hope you found all the information you were looking for in this article. We are certain that it will help you understand the importance of customizing a custom thank you page and how to do it via a plugin.
We understand that using codes could not always be possible. While there could be a possibility that your team might not have the technical proficiency required to implement codes, the way forward can be made easier through plugins.
Why not go ahead and give it a try? If you are looking for a comprehensive solution, check out StoreApps plugins and see a positive shift for yourself!