
You must have heard about WooCommerce shortcodes and probably used them too. But you may not know how it works.
If you want to unlock the full potential of WooCommerce, you must definitely familiarize yourself with shortcodes.
Why? Because shortcodes power much of the plugin’s functionality. This includes all pages such as the cart page, checkout page, product pages, product category pages, and my account page.
If you understand how WooCommerce shortcodes work better, you can easily create highly customized sales pages and build an incredibly powerful online store.
There must be a lot more questions lingering in your mind – what are WooCommerce shortcodes, why to use them, how you can use them…
We have covered all of them in this article. Read on.
What are WooCommerce shortcodes?
In simple terms, shortcodes in WooCommerce are short pieces of code/text wrapped in square brackets that look something like [this].
These shortcodes are long codes condensed within a shorter phrase. This makes it easier to use by an individual without any technical experience.
Shortcodes can help you perform the following tasks:
- Display checkout on any page.
- Showcase best-sellers on your homepage.
- Pitch related products when customers show an interest in a product.
- Display video and audio.
- Add a creative slider.
- Insert Add to Cart buttons.
- Highlight featured products in Gutenberg blocks, sidebars, other widgetized areas and many other aspects.
We hope you have understood the basics of shortcodes. Now, let’s see how you add them to your store.
How to add WooCommerce shortcodes?
Running a WooCommerce store can be time-consuming. Endless tasks such as store management, creating offers, coupons, checkout improvements and a lot more need to be taken care of. Shortcodes come in handy to save time, improve accuracy, eliminate errors associated with writing long codes, and make the process efficient.
There are three ways to add shortcodes:
Inserting shortcodes using Gutenberg block editor
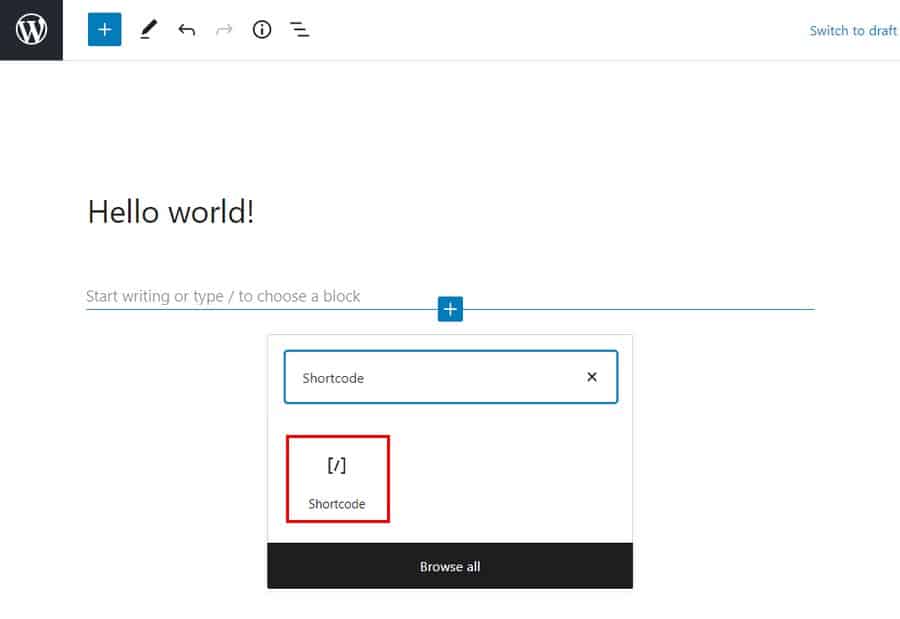
With the Gutenberg editor, adding shortcodes is easy. Here’s how to do it:
- Go to your WordPress Admin panel.
- Click on
Pages > Add New. You can also edit any existing page. - Click on the
plussign to add a new block, type ‘shortcode’ in the search bar and select theShortcodeblock. - Now, type in your shortcode in the field. For example:
[products]. - Click the blue
PublishorUpdatebutton at the top right of the page and your products will now show on your new page.
Inserting shortcodes using Classic editor/WordPress editor
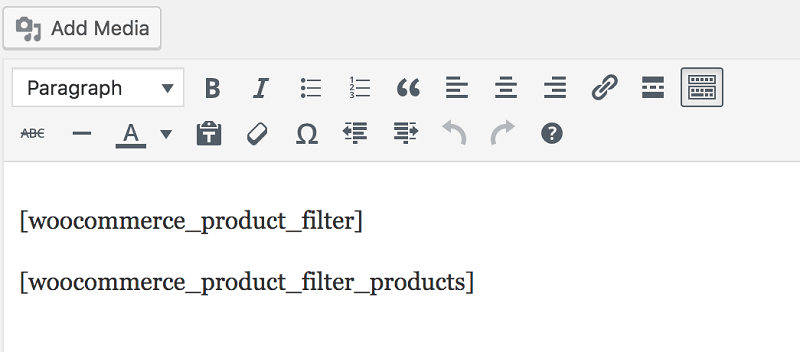
Adding shortcodes with Classic editor is also easy. Simply add the shortcodes along with the brackets ([ and ]).
Inserting shortcodes using the widget
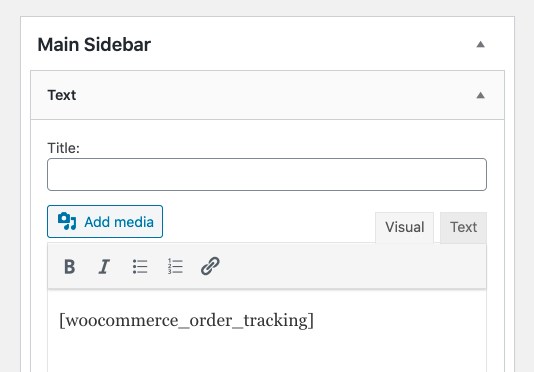
To add a shortcode to a widgetized area, just add a text widget with the shortcode. Then, load the page to see the shortcode’s content on your sidebar.
How WooCommerce shortcodes work?
While they look simple, shortcodes are quite powerful! Let’s cover the different aspects that make up a shortcode.
The shortcode itself:
As mentioned above, shortcodes are a single word or set of words connected with underscores, such as this:
[products][woocommerce_order_tracking]
While some shortcodes will function alone, others require some parameters.
Parameters:
Parameters or Arguments (called Args in some of WooCommerce’s documentation) are ways to make the shortcode more specific. For example, by adding id=”36″ to the [add_to_cart] shortcode, it will create an ‘Add to Cart’ button for the product with id 36.
All WooCommerce shortcodes list (Built-in)
There are five essential shortcodes available with WooCommerce:
[woocommerce_cart]– shows the cart page[woocommerce_checkout]– shows the checkout page[woocommerce_my_account]– shows the user account page[woocommerce_order_tracking]– shows the order tracking form[products]– shows the products
In most cases, these shortcodes will be added to pages automatically via the WooCommerce onboarding wizard and do not need to be used manually.
Let’s look at each shortcode and how to use them.
[woocommerce_cart]
This shortcode adds the WooCommerce cart functionality to the page. It will display all of the products that the user has added to their cart. There are no parameters to add to this shortcode.
[woocommerce_checkout]
As the name suggests, the WooCommerce checkout page shortcode is used to display the checkout page. Ensure setting up this page correctly. After all, if customers can’t find the checkout page easily or find the checkout difficult to navigate, they won’t buy anything.
No extra parameters to add to this shortcode as well.
[woocommerce_my_account]
This shortcode shows the My Account page containing all of the customer’s information, as well as their previous orders from your shop.
By default, the number of orders displayed is set to 15. You can change it to display all orders by making the number -1. You can add parameters or arguments to this shortcode like this:
array(
     'current_user' => ''
 )
woocommerce_my_account
Current user argument is automatically set using get_user_by( 'id', get_current_user_id() ).
[woocommerce_order_tracking]
This shortcode creates an “order tracking” page, which allows customers to see the current status of their orders. There are no other arguments.
[products]
WooCommerce product shortcode is one of the most robust shortcodes. It allows you to display products by post ID, SKU, attributes and categories with support for pagination, random sorting, and product tags.
It replaced the need for multiple shortcodes such as [featured_products], [sale_products], [best_selling_products], [recent_products], [product_attribute], and [top_rated_products] used in WooCommerce versions below 3.2.
There are various parameters that allow you to customize the types and quantities of products displayed.
To add a parameter, simply write its name, followed by the equals sign and the desired value inside quotation marks. Make sure this is inside of the [products] shortcode.
For example, to display five products from the sports category, use this shortcode: [products limit="5" category="sports"].
Available product attributes
The following attributes are available to use in conjunction with the product’s shortcode. There are a few parameters that help you control the layout of your product pages. Let’s look at them with examples, beginning with the display product attributes.
Display product attributes
- limit – controls the number of products displayed. Defaults to and -1 (display all) when listing products, and -1 (display all) for categories. Example –
[products limit="3"] - columns – controls the number of columns to display. Defaults to 4. although this will usually collapse into a smaller number on mobile (depending on your theme.) Example –
[products columns="3"] - paginate – determines whether your product result pages will be paginated. Used in conjunction with limit. Defaults to false, set to true to paginate. Example –
[products paginate="true"] - orderby – customizes how your products are ordered. The default is product title. One or more options can be passed by adding both slugs with a space between them. Available options are:
- date – the date the product was published.
- id – the post ID of the product.
- menu_order – the Menu Order, if set (lower numbers display first).
- popularity – the number of purchases.
- rand – randomly order the products on page load (may not work with sites that use caching, as it could save a specific order).
- rating – the average product rating.
- title – the product title. Example –
[products orderby="date"]
- skus – add specific SKUs separated with a comma. Example –
[products skus="shirt-black-small, shirt-black-large"] - category – display products that have a certain category slug. You can add more than one category by placing a comma in between them. Example –
[products category="watches, purses"] - tag – displays products that have a certain tag slug. You can add more than one tag by placing a comma in between them. Example –
[products tag="rainy, kids"] - order – states whether the product order is ascending (ASC) or descending (DESC), using the method set in orderby. The default is ASC. Example –
[products order="DESC"] - class – adds an HTML wrapper class so you can modify the specific output with custom CSS. Example –
[products class="custom-element"] - on_sale – displays sale products. Do not use it in conjunction with best_selling or top_rated. Example –
[products on_sale="true"] - best_selling – displays the products that sell the most. Do not use it in conjunction with on_sale or top_rated. Example –
[products best_selling="true"] - top_rated – displays the products that are the most highly-rated. Do not use it in conjunction with on_sale or best_selling. Example –
[products top_rated="true"]
Let’s move on to the next section to learn about content product attributes.
Content product attributes
These shortcodes can be used to display products based on their attributes. These include size and color to name a few.
- attribute – displays products with a certain attribute.
- terms – displays products with certain terms that are linked to the attribute. This must be used with the attribute above. For example, the attribute may be colors and the terms are red, blue or yellow.
- terms_operator – allows you to perform calculations to determine which terms will be included. Likewise, they must be used with attribute and terms. Available options are:
- AND – displays products from all of the chosen attributes.
- IN – displays products with the chosen attribute. This is the default terms_operator value.
- NOT IN – displays products that are not in the chosen attributes.
- tag_operator – the same as the term operator above, except for tags. Available options are:
- AND – displays products from all of the chosen tags.
- IN – displays products with the chosen tags. This is the default tag_operator value.
- NOT IN – displays products that are not in the chosen tags.
- visibility – displays products depending on their visibility on your site. Available options are:
- visible – products visible on shop and search results. This is the default visibility option.
- catalog – products visible only in the shop but not in the search results.
- search – products visible only in the search results but not in the shop.
- hidden – products hidden from both shop and search and accessible only by direct URL.
- featured – products marked as Featured Products.
- category – display products that have a certain category slug.
- tag – displays products that have a certain tag slug.
- cat_operator – allows you to perform calculations to determine which products will be included. Available options are:
- AND – displays products that belong in all of the chosen categories.
- IN – displays products within the chosen category. This is the default cat_operator value.
- NOT IN – displays products that are not in the chosen category.
- ids – displays products based on a comma-separated list of Post IDs.
- skus – displays products based on a comma-separated list of SKUs.
If the product is not showing, make sure it is not set to “Hidden” in the “Catalog Visibility”.
Examples of product scenarios based on attributes
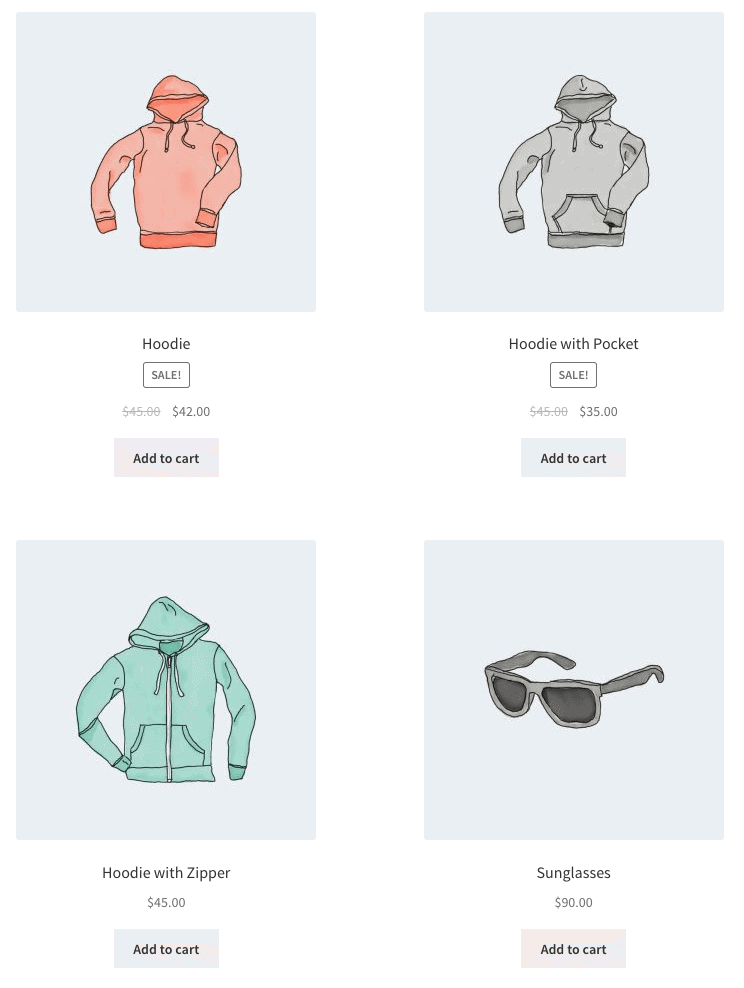
Scenario 1 – Random sale items

You want to display four products on sale.
[products limit="4" columns="4" orderby="popularity" class="quick-sale" on_sale="true"]
This shortcode explicitly states four products with four columns (which will be one row), showing the most popular on-sale items. It also adds a CSS class quick-sale, which you can modify in your theme.
Scenario 2 – Featured products
You want to display your featured products, two per row, with a maximum of four items.
[products limit="4" columns="2" visibility="featured"]
This shortcode says up to four products will load in two columns, and that they must be featured. Although not explicitly stated, it uses the defaults such as sorting by title (A to Z).
Scenario 3 – Best selling products
You want to display your top three best-selling products in one row.
[products limit="3" columns="3" best_selling="true"]
For more examples, refer to WooCommerce shortcodes documentation.
Product categories
These two shortcodes will display your product categories on any page.
[product_category]– displays products in a specified product category.[product_categories]– displays all your product categories. This is the generic shortcode for displaying a particular category. You’ll need to add a specific parameter, listed below, in order to actually display one (or more.)
Available product category attributes
- ids – displays specific categories by their ids. To be used in product_categories. Example –
[products _categories ids="1,2"] - category – This can be either the category id, name or slug. To be used in
[product_category] - limit – determines the number of categories that will be displayed. Example –
[products _categories limit="3"] - columns – determines the number of columns that will be displayed. The default is 4.
- hide_empty – this will hide empty categories. The default is “1” which will hide empty categories. Set to “0” to show empty categories. .Example –
[products _categories hide_empty="1"] - parent – this will show the child categories of a specific parent category, which is targeted by id. For example, [parent=”3″] will display the child categories of the category whose id is 3. If you set parent to “0”, only the top-level categories will be displayed. Example –
[products _categories parent="0"] - orderby – this controls the order in which categories are displayed. The default is to order by “name”. It can be set to “id”, “slug”, or “menu_order”. If you want to order by the ids you specified then you can use orderby=”include”. Example –
[products _categories orderby="id"] - order – states whether the category ordering is ascending (ASC) or descending (DESC), using the method set in orderby. Defaults to ASC. Example –
[products _categories order="ASC"]
Examples of product category scenarios
Show top level categories only
Imagine you only wanted to show top level categories on a page and exclude the sub categories, well it’s possible with the following shortcode: [product_categories number="0" parent="0"].
Other useful shortcodes
[add_to_cart]
The WooCommerce Add to Cart shortcode allows you to easily generate an Add to Cart button for a specific product, which is targeted by id. There are quite a few parameters. As with other shortcodes, each should be placed within two quotation marks, “like this”.
- id: Choose the product by ID
- style: Customize the CSS of the button directly
- sku: Choose the product by SKU
- show_price: Choose whether the price is displayed with the button. There are two options, “TRUE” and “FALSE”
- class: Assign an HTML class to the button, so that you can target it with CSS code
- quantity: Choose the product amount that will be added to the cart. In most cases, this will just be “1”
Example: [add_to_cart id="36" style="border: 1px solid #111111;" show_price="TRUE" quantity="1" class="example-cart-button"]
Add to Cart URL
This shortcode will display the actual URL of a particular product. There are only two parameters:
- id: Target the product by ID
- sku: Target the product by SKU
Example: [add_to_cart_url id="99"]
This will display the URL on the add to cart button of a single product by ID.
[shop_messages]
Want to display WooCommerce messages on non-WooCommerce pages? This shortcode will allow you to display notifications like “This product has been added to your cart” on any page with it.
Coupon shortcodes
WooCommerce also offers a way to display available coupons on any page and generate coupons automatically. However, you’ll need to purchase the Smart Coupons extension. Refer to the below posts to get the shortcodes:
- How to display available coupons on any page
- How to auto-generate coupons
Related product Shortcodes
Use the [related_products] shortcode with similar tags or categories on a product page that encourages cross-selling or upselling. Refer to the below post to show the related products:
- Different ways to show WooCommerce related products
Troubleshooting shortcodes
It may happen that the shortcodes you inserted may not work. Here’s what you need to check:
The shortcode is between tags:
When adding a shortcode to a page, make sure that it is not between tags, which are designed to display (and not execute) code.
Quotation marks are curly, not straight
Another common error is if the quotation marks (used with parameters) are angled, or “curly” (like this: “) and not straight (like this: “). Parameters won’t work with curly quotation marks.
Refer this document for more details.
List of WooCommerce shortcode plugins
Besides inbuilt and free WooCommerce shortcodes, here are some plugins that will help you to customize your store.
WP Shortcode
The WP Shortcode has 10,000+ installations. Until now, the premium plugin was only available to the premium members of the MyThemeShop, but now it’s available to all users.
The plugin has not been updated and hasn’t been tested with the latest three major releases of WordPress.
Key features:
- The plugin offers over 24 useful shortcodes, so you don’t lose anything when you change the theme.
- It also allows you to add buttons, highlights, boxes, toggles, tabs, pricing tables and a lot more.
- Easy to use and minimally styled for great navigation.
Pricing: $27
More about WP Shortcode plugin
Coupon Shortcodes
The Coupon Shortcodes has 7,000+ installations. The plugin offers conditional shortcodes and coupon info shortcodes.
Key features:
- Allows you to show coupon discount info using shortcodes.
- Helps to render coupon information and content conditionally, based upon the validity of coupons.
- Motivates further purchases by offering specific coupons when the content in the cart qualifies for it. It also allows the users to purchase additional items so that they can use a coupon.
More about Coupon Shortcodes plugin
Conclusion
WooCommerce shortcodes are exceptionally powerful. Although it may seem a little technical, it’s quite easy to use and implement.
We hope this guide helped you resolve all your queries related to WooCommerce shortcodes.
In the meantime, you can also check out our popular WooCommerce plugins that can make working on your WooCommerce store a smooth experience.
If you have any queries or suggestions, leave a comment below and we’ll sort it out!
FAQs
Can WooCommerce shortcodes be customized to fit specific design needs?
Yes, WooCommerce shortcodes can be customized to fit specific design needs. The appearance and functionality of the shortcodes can be modified using CSS, HTML, and PHP code. WooCommerce also provides documentation for developers to customize and extend the shortcodes.
Are there any limitations or compatibility issues to consider when using WooCommerce shortcodes with other plugins or themes?
Yes, there can be limitations or compatibility issues when using WooCommerce shortcodes with other plugins or themes. Some plugins or themes may not support certain shortcodes or may cause conflicts with the way the shortcodes function.
Can I use WooCommerce email shortcodes to include dynamic content in my emails, such as order details or customer information?
Yes, you can use WooCommerce email shortcodes to include dynamic content in your emails. These shortcodes allow you to easily insert information such as order details, customer information, and product information into your emails, making them more personalized and engaging for your customers.