The first thing your customer observes about the products in your store is the picture of the product.
As a WooCommerce store owner, you would want to use the one that best describes your product!
Because – For what is visible is what gets sold!
Instead of going through each product and setting the featured images and product gallery images on your WooCommerce store, you can do it directly and within seconds as and when required.
Wondering how? Read below to find out.
How to set featured images in WooCommerce?
Now, using the default WooCommerce, you need to enter each product to set featured images and product gallery images.
And you need to repeat the same procedure to replace or remove those images.
That’s quite time-consuming, right?
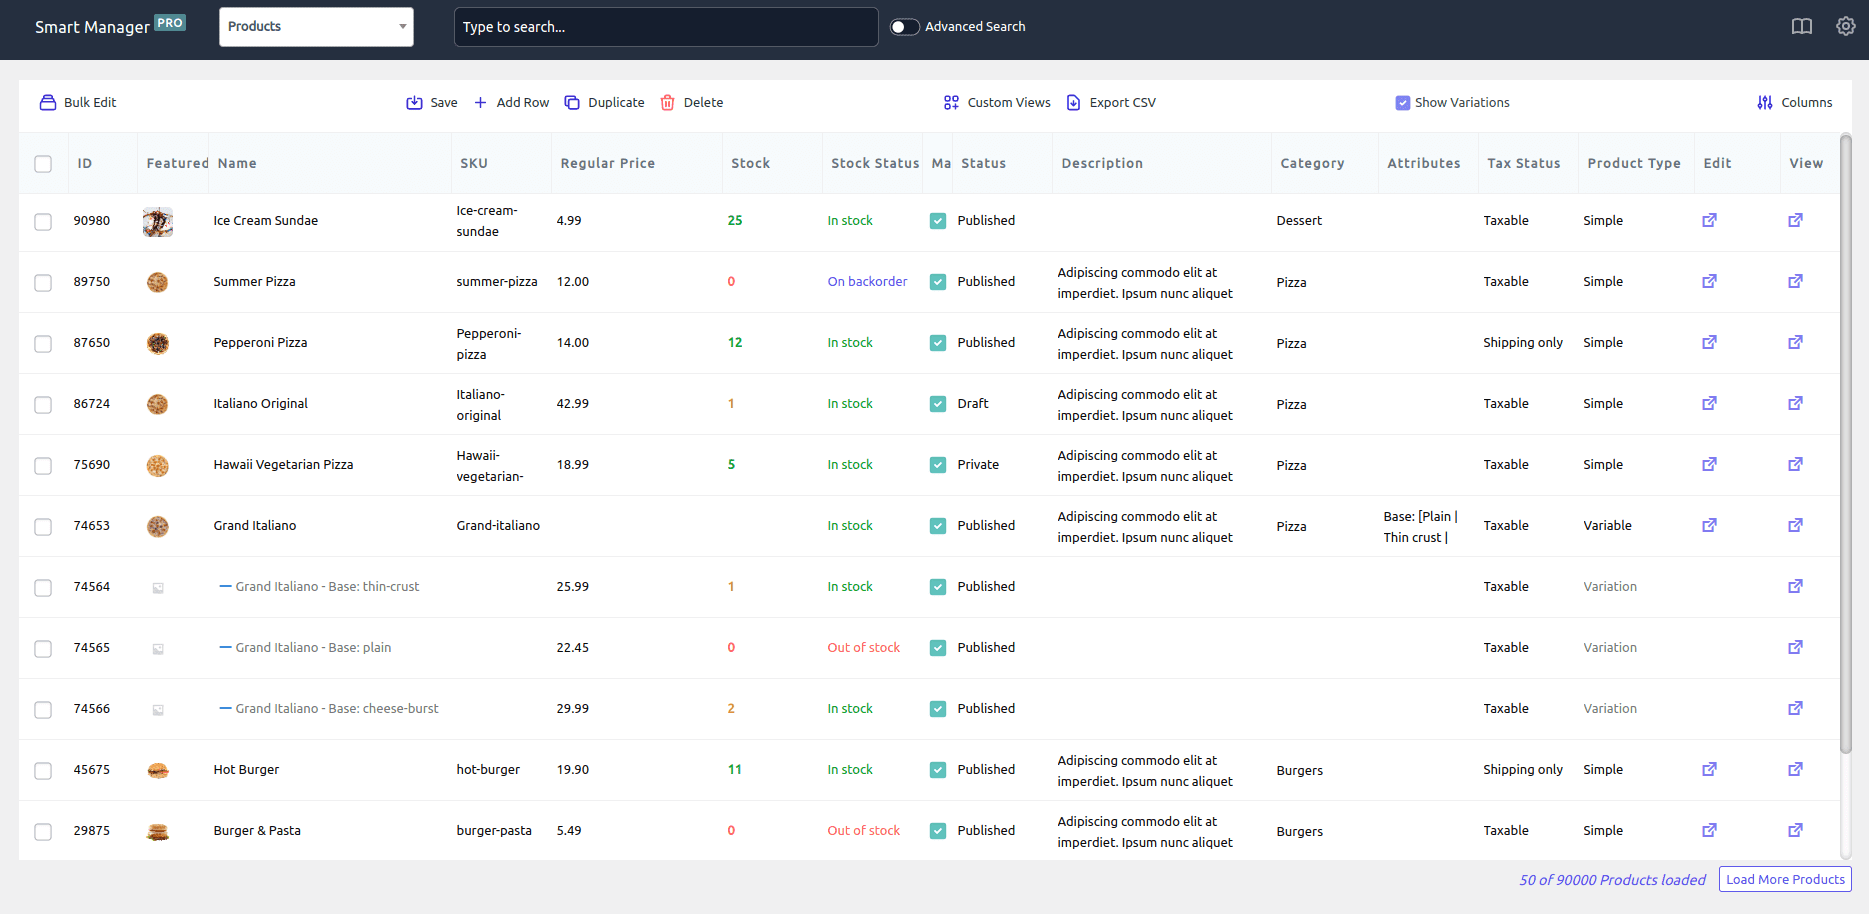
Enter Smart Manager and you can add/replace/remove the WordPress and WooCommerce featured images and product gallery images directly using an Excel-like spreadsheet.
The best part?
You can also update the images in bulk for hundreds of products at once.
Update featured and gallery images using inline edit
With inline edit, you can click on the cell to add/replace/remove an image.
- Install and activate Smart Manager plugin. Then go to WordPress admin > Smart Manager > Products dashboard.
- In the
Featured Imagecolumn, click on the cell you want to add or change the image for. If you can’t see the column, here’s how to enable it. - You will see the ‘WP Media Library’ opened up in a popup window. In the Media Library, you can select from the options available. Or in Upload files, you can upload a new picture from your device and set it as the featured image.
- Click on
Save.
That’s it. Like featured images, you can add/replace/remove product gallery images using inline edit.
The image will be uploaded and set for that product.
Repeat these steps as and when you want. This way, you can upload multiple images for products quickly using Smart Manager’s Excel-like spreadsheet view.
Now, we will see the process to set up featured images in bulk for selected products.
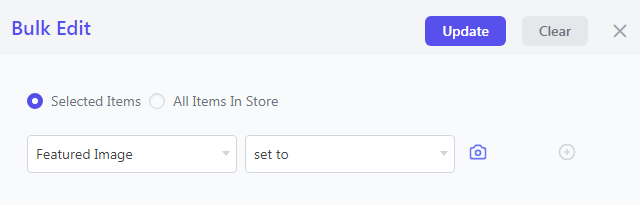
Update featured and gallery images using bulk edit
For a handful of products, inline edit is quite inconvenient. But what if you need to set a common featured image for multiple products at once, specially for product variations?
Say you are selling a Red T-shirt in seven sizes – XS, S, M, L, XL, XXL, XXXL. Here, a common image for all these variations will be required. Now follow these steps to set featured images in bulk, follow the steps
- Go to WordPress admin > Smart Manager > Products dashboard.
- Mark all the products/variations you want to set the featured image for. You can also apply advanced search filters to fetch desired product variants to set the images.
- Click on
Bulk Edit. It will open a slide over the panel. - Select
Featured Image. - Select action as set to.
- Click on the camera icon. You will see the
Media Libraryopened up in a popup window. In the Media Library, you can select from the options available. Or in Upload files, you can upload a new picture from your device and set it as the featured image. - Click on Update. You can select to bulk update
NoworSchedule for later. - Enter the name for this bulk edit task in case you need to Undo the changes.
- Click on Ok.
That’s all.
Repeat the same steps to set a common product gallery image for multiple products. Easy and quick!
How to find unattached media for any product/post?
It’s quite possible to have hundreds of media images unattached to a product, page or post. These could be some featured images as well.
Using Smart Manager, you can find all these featured images at once.
- Go to WordPress admin > Smart Manager > Media dashboard.
- Click on
Advanced Search. - Enter the condition
Post Parent == 0. - Click on
Search.
That’s it. All unattached media for the products/pages/posts will be in front of you.
Similar to featured images, you can also set featured products in WooCommerce quickly using Smart Manager.
How to set featured products in WooCommerce?
Want to make some products pop on your store’s homepage or promotional sections?
That’s where featured products come in.
They’re perfect for spotlighting your bestsellers, new arrivals, or any items you want to give extra visibility.
So, how do you actually mark them as featured? Let’s walk through the steps.
Using default WooCommerce
- Go to WooCommerce Admin > Products > All Products.
- Go to the product you would like to feature and click the
Staricon.

Another way to do it is:
- Hover on the product name and click on the
Quick Editoption. - Check the Featured box under the Visibility column and click
Update.
You need to repeat the same steps as and when required.
And to bulk set featured products:
- Select all the products you want to set as featured products in WooCommerce.
- Click the
Bulk actionsdropdown and selectEditand thenApply. - A window will appear. Go to the
Product datasection. - Select
Yesfrom the drop-down menu next to the Featured option. - Click
Update.
Using Smart Manager
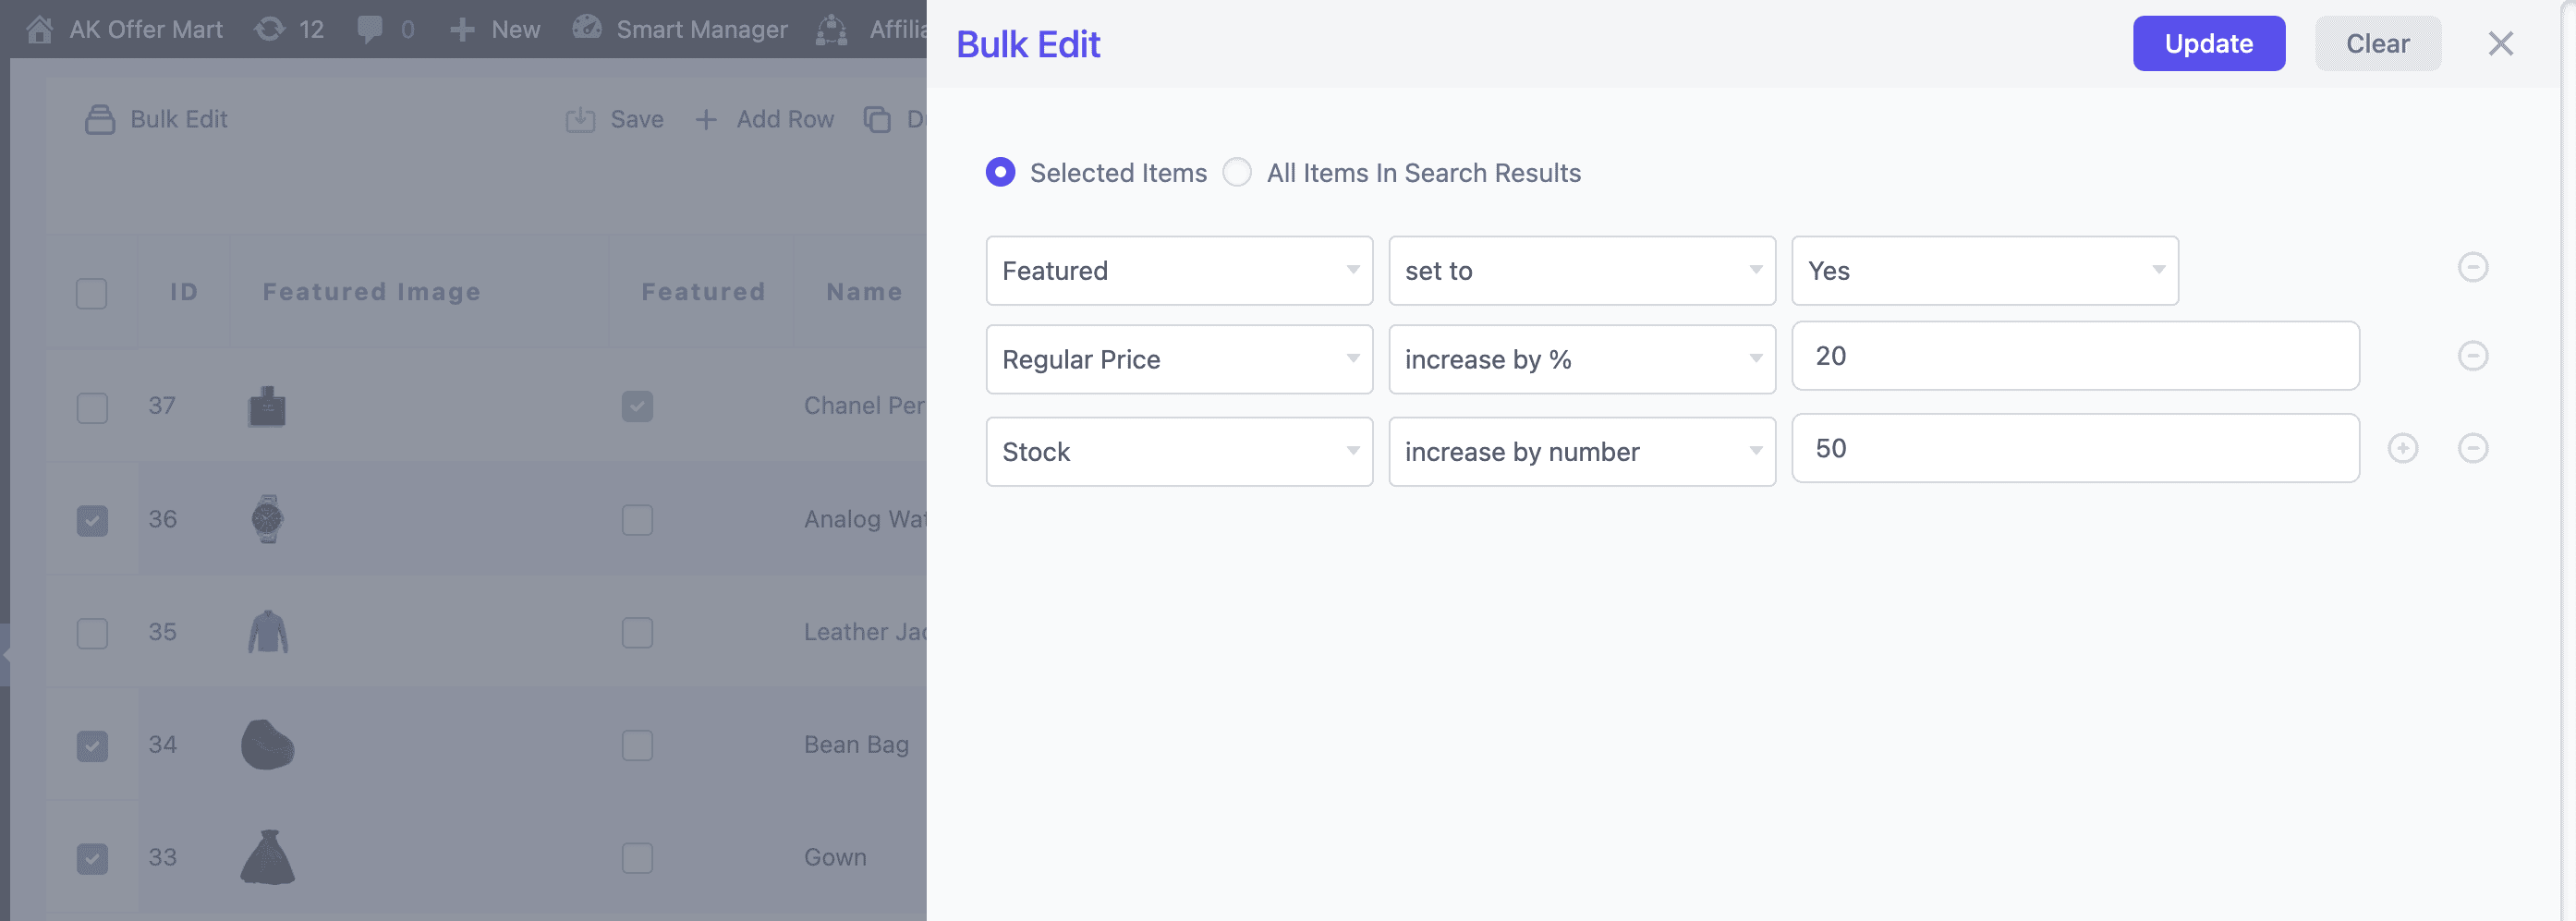
Smart Manager puts you in an advantageous position with its Excel-like spreadsheet look and advanced search filters. You get to set the featured products for WooCommerce websites within a few seconds.
You can do it via inline edit and also mark products as featured in bulk.
- Go to WordPress Admin > Smart Manager > Products dashboard.
- Select the products you want to feature and click the
Bulk Editicon in the top left corner. - A slide-over panel window will appear. Select
Featuredand select the Set to option from the drop-down menu. - Select
Yesfrom the drop-down menu and clickUpdate. Add other bulk edit actions if required. - Choose
NoworSchedule for laterand click on Ok.
Once updated, all the selected products will have the checkboxes in the Featured column.
But that’s not all!
The Smart Manager is far more advantageous for your WooCommerce store. Here, you can see for yourself.
- Search, view, manage and bulk edit any WordPress post type.
- Manage any custom fields and custom taxonomies.
- Bulk edit product prices, inventory and other attributes.
- Manage and edit custom orders and backorders.
- Advanced export of orders, products, customers, users and other post-type data to CSV.
- Bulk edit post status, post categories, post date, post tags, etc.
- View the customer’s lifetime value, last order date and contact details.
- Import products in a few clicks.
- Modify discount rules for many coupons at once.
and many more…
Winding up
Setting featured products on the WooCommerce website is complementary and beneficial. It helps you attract customers’ attention to certain products easily.
With Smart Manager, you get all the products listed in one place. Hence, it makes your job smarter and saves you hours of your precious time.
Not just the products but you can also change the featured image of any page, product, or blog post on your WooCommerce store with equally quick and simple steps.
FAQs
What is the resolution for WooCommerce featured images?
The resolution for the WooCommerce featured images is:
- Minimum: 800px x 800px.
- Maximum: 1000px x 1000px.
For the single product, the images must be 680px x 680px (min) and can go up to 800px x 800px. The gallery thumbnail size is set to 100×100 pixels by default.
But, you can opt for the resolution as high as you want for better quality.
What image format is best for WooCommerce?
Normally, the best image format is jpg or png. Other formats WooCommerce supports include GIF, WebP, SVG (Scalable Vector Graphics) and AVIF.
Amazing! Your blog was absolutely fantastic! A large amount of great information which is often attractive some and the other way. Thanks.